
Webex Calling User Guide
Android & Apple iPad Tablet
Overview
The Tablet Client for Android and Apple iPad provide the following communication features:
• In
stant messaging and Presence (IM&P)
• Voice calling (VoIP)
• Video calling
• Call Settings
Download the Tablet Client
Download the iOS client from the Apple App Store. Search for Virtual Communications Express and
select the TABLET version.
-OR-
Download the Android client from Google Marketplace. Search for Virtual Communications Express
and select the TABLET version.
Once the client is downloaded and you are signed in you are ready to use the client.
Webex Calling
User Guide: Android & Apple iPad Tablet
2
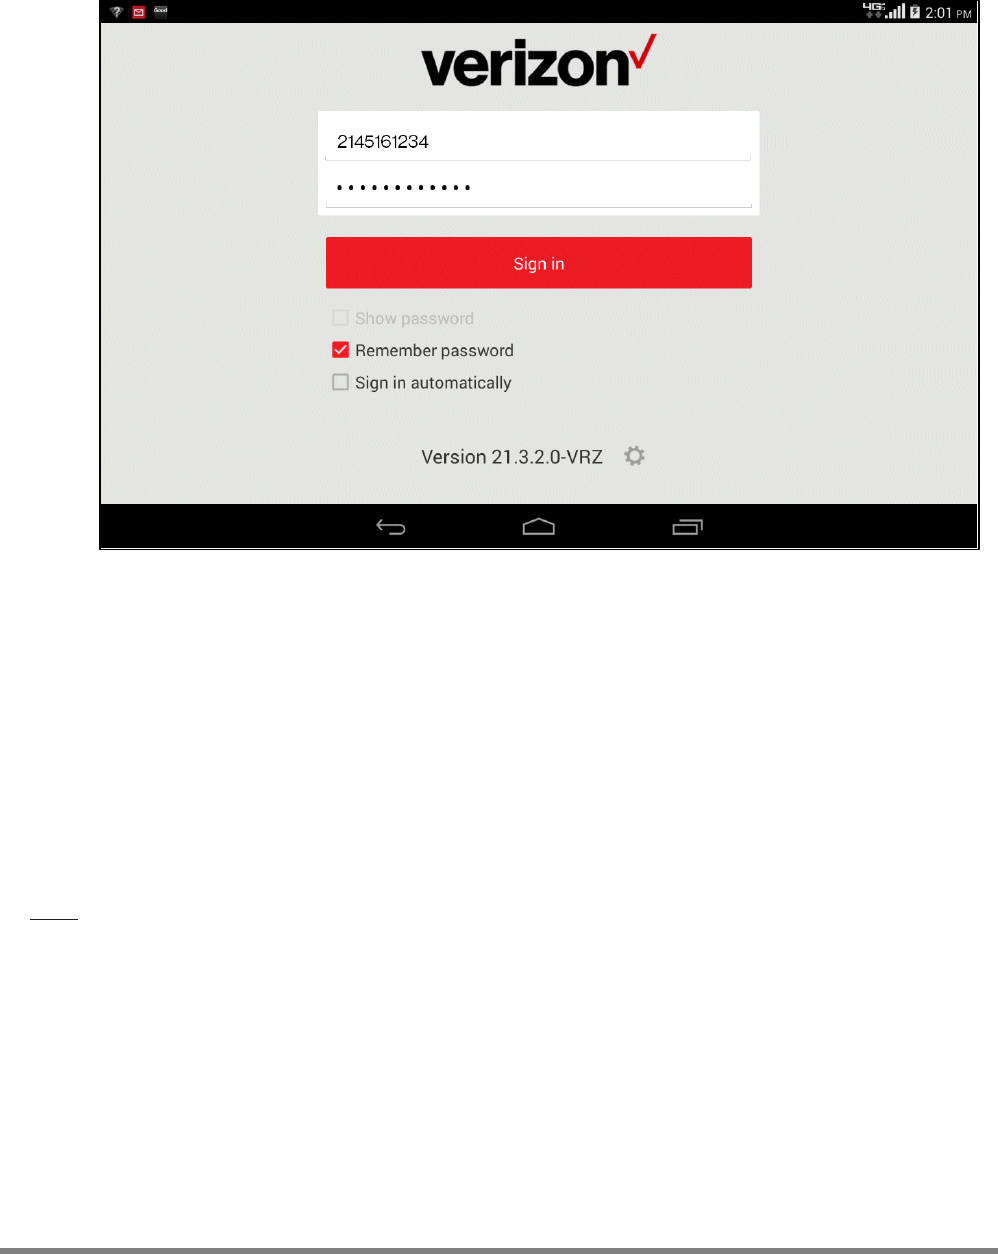
Sign In
1. Go to your apps on your phone and open the Virtual Communications Express app. The sign in
s
creen appears.
Figure 1 Sign In
2. Enter your user name on the sign in screen (phonenumber@domain). If you do not know your user
name, it is displayed on the
UC-Tablet Downloads
screen on the
My Features
tab in the
My Phone
dashboard (see Figure 2 on page 2). This field is automatically populated after initial login.
3. Enter your password. It is the same as your
My Phone
password.
4. Check Show password to unmask your password, if applicable.
5. Check Remember password if you do not want to enter your password every time you sign in.
6. Check Sign in automatically to automatically sign in to the Tablet Client when launched.
7. Tab Sign in.
Note: If you change your password on the
My Phone
dashboard, you must also change it in the
Virtual Communications Express Tablet Client.

Webex Calling
User Guide: Android & Apple iPad Tablet
3
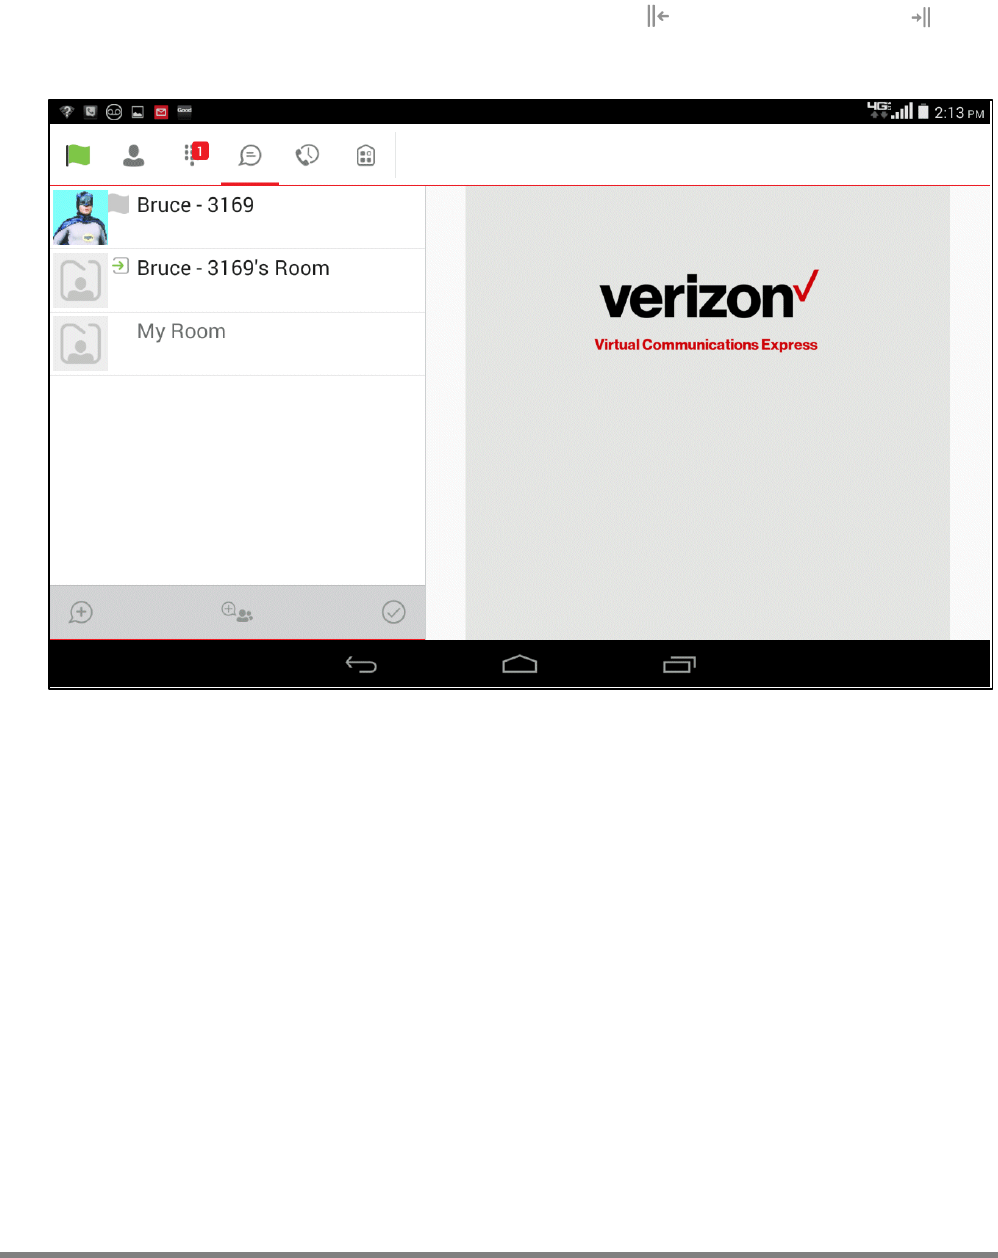
Tabs
When you start UC-Tablet for the first time your
Contacts
list is empty. You use the search option to find
people and add them to your
Contacts
list. Contacts can also be added manually by tapping the Add
button.
Figure 2 Tabs
The
Contacts
tab enables searching the Enterprise Directory and your personal
contacts.
The
Call
tab displays the dial pad where you can call a number. A long press on
1
on the numeric pad dials your voice mail.
The
Chat
tab displays the chat history.
The
Call History
tab contains a log of all activity to and from your number
including those from your desk phone, mobile app, and/or desktop softphone. At
the bottom of the screen are filters to view activity for All, Missed, Received, or
Placed calls.
The
My Room
tab enables you to join your personal room.

Webex Calling
User Guide: Android & Apple iPad Tablet
4
Contacts
The contacts in
Contact
list can contain two different types:
• Presence-enabled contacts
• Non presence-enabled contacts
Any contact can be marked as a favorite and appears at the top of the
Contacts
list in the
Favorites
section.
Presence-enabled contacts are users with an Extensible Messaging and Presence Protocol (XMPP)
address. Non presence-enabled contacts can be phone or conference numbers.
The
Contacts
list can be organized into groups:
• Contacts – All, Online
• Contact directories – Local Address Book, Directory
Add a Contact
By default, your presence information is always shared with a new contact if an XMPP address is
provided.
• Tap the Add icon on the status bar to add a presence-enabled contact and/or conference
number.
• Use the directory search to add a contact and/or conference number.
• Tap the Add icon to add a conference number.
• Tap Add Local Contact to add a local contact.
A conference contact is a special contact used for conference bridges to avoid having to remember a PIN
code and a conference number, for example, in recurring conferences.
If you receive a buddy request invitation, you can ignore or accept it. If you ignore a buddy request, then
you can always share your presence information later by selecting
Subscribe from the buddy’s contact
card. Note: The contact must accept your subscription request for you to successfully establish a
presence relationship.
Edit a Contact
Open a contact to perform the following functions:
• Unsubscribe - removes the presence relationship between you and that contact. You will not see
the contact’s presence information, and the contact does not see yours. An unsubscribed contact
remains in the
Contacts
list and is always shown as “offline”. Select Subscribe to re-establish a
presence relationship.
• Remove – removes the contact from your
Contacts
list.
• Edit – opens the contact’s information. You can add, edit, or remove information for presence-
enabled and non-presence-enabled contacts.

Webex Calling
User Guide: Android & Apple iPad Tablet
5
Search the Enterprise Directory
The Table Client supports a directory search of the enterprise directory. The search is performed in a
separate input field on the
Contacts
tab. Tapping the search icon opens the search view and the
enterprise directory search results are displayed with the names and numbers.
Typing a search string starts the filtering process through the contacts. The search is performed in the
directory list. Tap the back key to minimize the keyboard, hide the search bar, and empty search results.
Long press on a name to open the context menu and hide the keyboard and keep the search bar with the
characters. Short press on a contact to open the contact card.
The context menu contains the following options for the directory list:
• VoIP call
• Video call
• Contact details

Webex Calling
User Guide: Android & Apple iPad Tablet
6
Presence
For each contact to which you have subscribed, you can see their presence. Similarly, your contacts can
see your presence on their
Contacts
list. Presence means that your friends are able to see whether you
are available, for example, “I’m available” or “I’m busy”.
You can set your own presence by tapping the Presence icon on the status bar in all tabs view. You can
change your avatar, personal message, and presence status. Your avatar is the picture that represents
you in your friends
Contacts
list and chat screens. Tapping on an avatar opens a screen with options to
select an existing image, take a new one with your phone camera, or to clear your avatar.
You can enter a status message in the area next to the avatar. This status text is shown in your friends
Contacts
list.
If you see the error message, “Chat Unavailable”, under any tab, it means that the XMPP connectivity has
been lost for chat and presence; however, you can still make calls.
The presence update is only triggered by appointments and meetings that are either accepted by you or
made by you. Note: all day meetings do not trigger a presence change to
Busy – In Meeting
.
Icon
Description
User is online and ready for communication.
User is online but has been idle or away from their computer for more than ten
minutes.
User is busy and does not want to be disturbed.
User is offline and the only available contact method is calling or chatting.
A subscription is pending and the contact has not yet approved sharing their presence.
Contact is busy on a call. This is an automated presence status.
Contact is busy in a meeting. This is an automated presence status. The
Busy – In Call
status overrides the
Busy – In Meeting
status so this one is only seen if there is a
meeting but no call.
My Status
You can set your own presence by tapping on your personal status from the side navigation. The
My
Status
screen opens and you can change your avatar, personal message, and presence status. Your
avatar is the picture that represents you in your friends’ contact list and in chat screens. You can enter a
status message into the area next to the avatar. This status text is shown in your friends’ contact list.
Webex Calling
User Guide: Android & Apple iPad Tablet
7
Instant Messaging
Chat
You can only chat with a contact if you are both online. When you initiate a chat, the
Chat
view opens in
the right pane. To open a chat in full screen, tap the collapse icon to hide the left pane. Tap to
expand it. If a contact initiates a chat, a notification badge on the
Chat
tab displays and the entry appears
on the top of
Chat History
list.
Figure 3 Chat
Start a chat using one of the following methods:
• Tap a contact from in the
Contacts
list to open a contact card. From the contact card, choose
the chat icon to start a chat.
• Long press on a contact to access chat options.
• Tap a contact entry to start a chat in the
Chat History
list.
• Tap the Start New Chat icon on the
Chat
tab.
• Tap a contact from search results to open the contact card, and then tap the Chat icon.

Webex Calling
User Guide: Android & Apple iPad Tablet
8
Group Chat
The Chat screen opens when you initiate a group chat. Tap the Add Participant icon to add more
participants to the chat. Anyone in the group chat can add participants, and the owner can dismiss
participants.
A group chat works the same way as a one-on-one chat. All messages from anyone are sent to everyone
else. All contacts need to be online to be able to participate in a group chat. A group chat history is saved
and is available to view later on the Chat tab.
A user can tap Leave Chat to leave a group chat. The chat is marked as “offline” and the user no longer
receives messages from the chat. The user can tap Offline Chat to re-join the room and receive
messages. However, the user does not receive the messages that were sent in the chat while the user
was outside of the room.
Figure 4 Group Chat
Tap Clear History to remove local chat history.
Tap View Participants to show the list of participants in the group chat.
Tap Delete to delete a chat room.
Start a group chat using one of the following methods:
• Tap the Add Participant icon in single chat session to escalate from a single to a group chat.
• Select the Start Group Chat icon on the
Chat
tab.
• Tap a group communication entry in the
Chat History
list to start a group chat.

Webex Calling
User Guide: Android & Apple iPad Tablet
9
Audio/Video Calls
Place a Call
The
Call
tab displays a dial pad and a text field to enter numbers. There are two buttons below the dial
pad: call and a dial pad menu.
The 1 button has a voice mail icon. A long press on the 1 connects you with your voice mailbox. The icon is
grey if you have no messages.
The dial pad menu contains two options: Pull Call and Retrieve Call. The Pull button retrieves a call in
progress on your desk phone to the Tablet Client. The
Retrieve Call button is used to retrieve a call
parked at your extension.
Figure 5 On a Call
You can make an audio or video call using one of the following methods:
• Tap a contact in the
Contacts
list. Select to make an audio call, or to make a video call.
• Open the dial pad, enter a phone number, and tap the or .
• Select a call entry in the Call History list. Select to make an audio call, or to make a video call.
• On the Chat screen, select to make an audio call, or to make a video call.

Webex Calling
User Guide: Android & Apple iPad Tablet
10
Answer a Call
An incoming call is indicated with a ringtone. There are two options on the incoming call screen: Accept
and
Decline. If you decline the call, it causes the line to sound busy at the caller’s end and they know that
you rejected the call.
In Call Actions
Figure 6 In Call Actions
Figure 7 Call Options

Webex Calling
User Guide: Android & Apple iPad Tablet
11
The following call control actions are available during a call:
End a Call
Transfer a call – Unattended
Mute the microphone
Start a conference
Place a call on hold
Park Call
Adjust the volume
Conference
Escalate from audio to video call
and downgrade from video to audio
call
Transfer a call to circuit-switched call
Open the dial pad
Add more participants (conference call
only)
Make a new call
Merge two separate calls
Transfer a call - Attended
Swap two separate calls
Message Waiting Indicator/Voice Mail Access
If you have pending voice mails (VM), the notification bar displays an icon and text, “You have XX pending
voice mail messages”. Select the voice mail notification to dial the voice mail access number directly and
listen to your messages. You can also press and hold 1 on the dial pad to access voice mail.
All notifications (missed calls, new messages, etc.) are handled through the notification bar.
Business Line Call Back
You can originate a call using your business line identity using the basic callback feature. Callback rings
the mobile device, desk phone, or both and then places the outbound call when answered by you. Basic
Callback is only available if you have Mobility enabled, providing the option to make calls using the
Callback feature.
Call Through is available if the Mobility service is assigned to your profile. When a call is placed in this
mode, the app communicates transparently connecting your directly to the destination identifying the call
with your business line identity.
Contact Name Lookup
When receiving a call, the Tablet Client searches for the name in the following sources and in the
following order: XMPP contact name, Enterprise directories, Local Contact, P-Identifier header (SIP), and
From header (SIP). If the number matches a contact the name is shown on the incoming call screen.
N-Way Calling (Conference)
The Table Client supports network SIP-based conference calls. While on a two-way audio or video call,
you can add more participants by using the
Conference button. Your address book is opened to search
for and select the new participant. Once the conference is established, the participants are shown on the
screen.
You can also select the Merge option to create a conference call or add participants in an existing
conference.
Call Waiting
When there is more than one active call, you have a Swap option that allows you to switch between the
calls. You can also tap a call on the list on the left.

Webex Calling
User Guide: Android & Apple iPad Tablet
12
New Call
The Tablet Client supports starting a new call during an ongoing call. Tap on the New Call button or
select one of the options listed under
Place a Call. The first call is put on hold after the new call is
established. You can swap the two calls or merge them into a conference.
Call Transfer
You can transfer VoIP calls to another party. Select Transfer and dial a number. You have two transfer
options:
• Attended Transfer - select Talk First and a second call is placed with the selected contact. If the
call is successfully established, the lower right button is replaced by the
Complete button. You
can talk with the third party privately before completing the transfer. The first party is on hold until
the transfer is completed.
• Unattended/Blind Transfer - select Transfer and the second party is transferred to the selected
contact. The current user is dropped from the call.
Call Pull
You can use Call Pull where you have two endpoints, e.g., a VoIP desk phone and a mobile phone with the
Tablet Client. If you have an active call on the desk phone, you can transfer it seamlessly to the mobile
phone. There is no interruption to the voice call.
1. Select the call menu. A pop-up appears to pull or retrieve the call.
2. Select Pull Call.
Call Park
Call Park is used to place a call in a hold status, which can be retrieved by another phone by dialing the
feature access code or through the command button.
1. While on an active call, select the call menu. A pop-up appears allowing you to conference or park
the call.
2. Select Park Call. You are prompted to enter a phone number.
3. Enter the phone number and press #.
-OR-
Just press # to park against your station.
Swipe Between Chat/Audio-Video, & Screen Share Views
The Tablet Client allows you to switch between Chat and Audio/Video sessions for
My Room
, other users’
My Room
, or two-way chat. This is indicated by the presence of dots at the bottom of the screen.
Perform a swipe to switch between the sessions.

Webex Calling
User Guide: Android & Apple iPad Tablet
13
Call History
Access call history for placed, received, and missed calls on the
History
tab. Icons indicate whether a call
was incoming, outgoing, or missed: green arrow = incoming, blue arrow = outgoing, and red arrow =
missed. It also displays the name, number, caller status, and number, if available along with the date and
time. You can place a call from your call history.
Figure 8 Call History

Webex Calling
User Guide: Android & Apple iPad Tablet
14
Call Settings
The Tablet Client supports the following call settings:
• Do Not Disturb (DND) - when activated, all communication is blocked by the server to the mobile
device and any other stations on the Dashboard. Enable the
Ring Splash to receive a distinctive
ring reminding you that DND is enabled.
• Call Forwarding –forward all calls, unanswered calls, or when your line is busy.
• Remote Office - allows the use of any phone as your office phone from a charging and
numbering perspective. For example, a hotel room phone can be used as your office phone.
Enable Remote Office and specify a phone number to be used as the Remote Office number.
• Hide Number - hide or display your number when calling or communicating with other parties or
contacts. Tap
Enable to hide your number, or Disable to show your number.
• Office Anywhere - Office Anywhere allows service providers to offer fixed-mobile convergence
(FMC) services without additional equipment. Office Anywhere simplifies communications for on-
the-go users and remote users by extending the features of a desk phone to any other fixed or
mobile device, regardless of the network or handset manufacturer. Callers dial one number and
can reach you on any phone you choose. A desk phone, cell phone, and/or a soft phone can ri
ng
sim
ultaneously. Voice call continuity is possible with the ability to move live calls from one device
to another without hanging up.
Add locations (numbers) that can be used in the service using the Add New Location option.
Tap Alert All Locations to activate parallel ringing.
Tap Diversion Inhibitor to prevent a call ending up as a voice mail.
Tap Answer Confirmation to receive a separate audio prompt when answering a call from a
number (location). For example, it may be useful in cases where mobile numbers are being used to
prevent incoming calls going to mobile voice mail since the call ends without going to voice mail if
the answer confirmation is not provided.
Tap Call Control to enable the server platform to provide mid-call services such as Call Transfer
and Conferencing for that number (location).
• Mobility - extends features transparently to the mobile network. You can set the following
a
ttributes:
o Active - flag to enable or disable the Mobility service.
o Mobile Number - your mobile number in E.164 format.
o Phones To Ring - default is
Fixed
with the following options:
Fixed - if set, then only your desk phone is alerted.
Mobile - if set, then only your mobile phone is alerted.
Both - if set, then both your mobile and desk phone are alerted.
The following attributes apply when the alerting mobile is set:
o Alert Click To Dial - if checked, Click-To-Dial calls alert your mobile phone.
o Alert Group Paging - if checked, group paging calls alert your mobile phone.
o Diversion Inhibitor - determines whether the Application Server enables a diversion
in
hibitor when extending a call leg to your mobile phone.
o Answer Confirmation - determines whether the Application Server prompts for an
a
nswer confirmation when you answer the mobile call leg.
Webex Calling
User Guide: Android & Apple iPad Tablet
15
o Call Control - determines whether call control is to be performed by the mobile device
(off) or by Verizon (on). This must be turned on to provide mid-call service features to the
mobile originated or terminated calls.
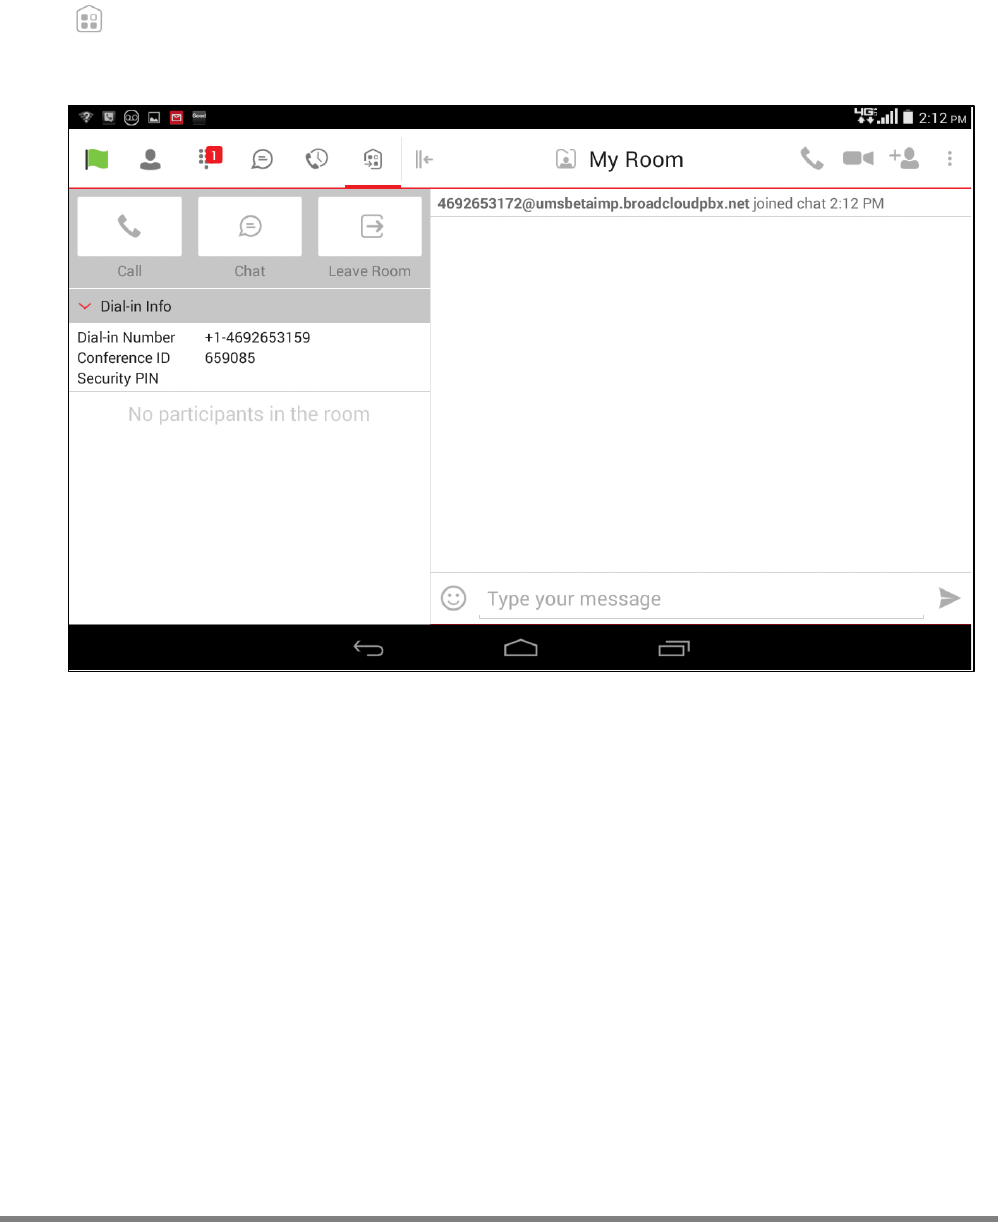
My Room
My Room is an always available and a permanent room that you can use to chat with anyone that joins.
Tap to access My Room. My Room uses your permanent chat room, permanent collaboration room,
and a conference bridge (audio or video). All My Room sessions start as chats but a call can be added to
the session while in progress.
Figure 9 My Room
Tap Add Participants to add more participants, or they can tap you name in their contact list to join your
room. Once participants join the chat room, they can tap the
Call button to automatically join the
conference.

Webex Calling
User Guide: Android & Apple iPad Tablet
16
Screen Share
The Tablet Client for Android supports viewing a screen share session initiated on the Desktop. When a
Screen Share invitation is sent via the Desktop, the badge notification appears on the main bar and in the
chat list view. Selecting the entry with screen sharing from chat list opens a communication pane with the
share by default. You can return to the chat/call (if present) with a swipe. When the share is paused, the
Screen Share view remains active showing the last image that was shared.
Viewing Screen Share is available in all communication modes:
• My Room
• One-to-one chat
• Ad Hoc group chat room (MUC)
Multi-Device
The Tablet Client provides support for users with multiple devices. This includes several features:
• Chat invitations are sent to all devices.
• Retrieving one’s own presence notifications when another client updates the user’s presence. The
client updates its own status based on the information it receives from the server.
• Accepting a shared presence invitation in one client is also recognized by another client, and both
c
lients start receiving presence updates.
• A new presence subscription made in one client is recognized in another. If the contact blocks the
in
vitation, there are presence notifications from the server to all of the user’s clients indicating
that the subscription was terminated and this information is shown to the user. If the client
receives two presence authorization requests from two or more devices for the same user, it only
shows one request to the user.
• Removing a contact from a contact list in one device is recognized in another client, and the
Contacts
list is updated in the other client as well.

Webex Calling
User Guide: Android & Apple iPad Tablet
17
Preferences
The Tablet Client supports the following preferences:
• Language
• Device ID - The Tablet Client can lock a user to a single desktop or mobile device so that the
software cannot be used on other hardware. Android users can copy the Device ID from
Preferences
before signing in to the application and provide it to the company administrator. The
administrator locks the Tablet Client to the reported device and the user can sign in only from this
device.
• Troubleshooting – access trouble logs.
• Remember password – check if you want to mobile app to remember your password every time
you log in.
• Sign in automatically (disabled until Remember Password is checked) – check to automatically
sign in when you launch the mobile app.
• Help

Webex Calling
User Guide: Android & Apple iPad Tablet
Additional Help and Resources
Getting Started with Your Service
To learn how to manage your user account settings and site service features, go to:
https://customertraining.verizon.com/virtualcommtraining.
Returning Equipment
Should you require replacement equipment, please refer to the Return Merchandise Authorization (RMA)
quick reference guide located at https://customertraining.verizon.com/virtualcommtraining.
Contact Us
Virtual Communications Express Support: 800–287–6235
Or visit https://customertraining.verizon.com/virtualcommtraining
For questions on other Verizon products: 800–230–9800
© 2017 Verizon. All Rights Reserved. The Verizon name and logo and all other names, logos, and slogans
identifying Verizon’s products and services are trademarks and service marks or registered trademarks and
service marks of Verizon Trademark Services LLC or its affiliates in the United States and/or other countries.
All other trademarks and service marks are the property of their respective owners.
Version 1.17 October 2017
