ECE 4750 Computer Architecture
Tutorial 0: Remote Access to ecelinux
School of Electrical and Computer Engineering
Cornell University
revision: 2022-09-27-22-05
Contents
1 Introduction 3
2 Connecting to the Cornell VPN 3
3 Remote Access via PowerShell 4
3.1 Starting and Configuring PowerShell . . . . . . . . . . . . . . . . . . . . . . . . . . . . . 4
3.2 Logging into ecelinux Servers with PowerShell . . . . . . . . . . . . . . . . . . . . . . 4
4 Remote Access via Mac Terminal 6
4.1 Starting and Configuring Mac Terminal . . . . . . . . . . . . . . . . . . . . . . . . . . . 6
4.2 Logging into ecelinux Servers with Mac Terminal . . . . . . . . . . . . . . . . . . . . . 6
5 Remote Access via VS Code 7
5.1 Installing VS Code on Your Laptop/Workstation . . . . . . . . . . . . . . . . . . . . . . 7
5.2 Starting and Configuring VS Code . . . . . . . . . . . . . . . . . . . . . . . . . . . . . . 8
5.3 Logging into ecelinux Servers with VS Code . . . . . . . . . . . . . . . . . . . . . . . . 8
5.4 Using VS Code . . . . . . . . . . . . . . . . . . . . . . . . . . . . . . . . . . . . . . . . . 10
5.5 Troubleshooting Remote Access via VS Code . . . . . . . . . . . . . . . . . . . . . . . . 11
6 Remote Access via X2Go 12
6.1 Installing X2Go on Your Laptop/Workstation . . . . . . . . . . . . . . . . . . . . . . . . 12
6.2 Starting and Configuring X2Go . . . . . . . . . . . . . . . . . . . . . . . . . . . . . . . . 14
6.3 Logging into ecelinux Servers with X2Go . . . . . . . . . . . . . . . . . . . . . . . . . . 14
6.4 Logging out of ecelinux Servers with X2Go . . . . . . . . . . . . . . . . . . . . . . . . 14
6.5 Troubleshooting Remote Access via X2Go . . . . . . . . . . . . . . . . . . . . . . . . . . 17
7 Remote Access via MobaXterm 17
7.1 Installing MobaXterm on Your Windows Laptop/Workstation . . . . . . . . . . . . . . 17
7.2 Starting and Configuring MobaXterm . . . . . . . . . . . . . . . . . . . . . . . . . . . . 17
7.3 Logging into ecelinux Servers with MobaXterm . . . . . . . . . . . . . . . . . . . . . . 18
1
ECE 4750 Computer Architecture Tutorial 0: Remote Access to ecelinux
8 Remote Access via Mac Terminal with XQuartz 19
8.1 Installing XQuartz on Your Mac OS X Laptop/Workstation . . . . . . . . . . . . . . . . 19
8.2 Starting and Configuring Mac Terminal . . . . . . . . . . . . . . . . . . . . . . . . . . . 20
8.3 Logging into ecelinux Servers with Mac Terminal . . . . . . . . . . . . . . . . . . . . . 20
9 Remote Access via VS Code with XQuartz 20
10 Linux Text Editors 22
10.1 Using the Micro Text Editor . . . . . . . . . . . . . . . . . . . . . . . . . . . . . . . . . . 22
10.2 Using the Geany Text Editor . . . . . . . . . . . . . . . . . . . . . . . . . . . . . . . . . . 22
10.3 Other Editors . . . . . . . . . . . . . . . . . . . . . . . . . . . . . . . . . . . . . . . . . . 23
11 Sourcing the Course Setup Script with Auto Setup 23
2

ECE 4750 Computer Architecture Tutorial 0: Remote Access to ecelinux
1. Introduction
All of the laboratory assignments for this course will be completed by remotely logging into a cluster
of ecelinux servers. The ecelinux servers all run the Red Hat Enterprise Linux 7 operating system,
and they all use an identical setup. You do not need to do anything special to create an ecelinux
account. You will be using your NetID and Cornell password to login, and an ecelinux account will
be automatically created for you when you first login. Any student enrolled in any ECE class should
automatically be granted access to the ecelinux servers. Having said this, if you cannot log into the
ecelinux servers please reach out to the course staff for assistance.
Later tutorials will discuss how to use the Linux development environment and the Git distributed
version control system. In this tutorial, we focus on how to setup remote access to the ecelinux
servers by first connecting to the Cornell VPN and then choosing one of several different remote
access options. Which remote access option to use depends on your operating system, whether or not
you are planning to use Linux applications with a graphical user interface (GUI), the speed of your
network connection, and your own personal preference. The following table provides a summary of
these remote access options.
Remote Access Option
Operating
System
Can use Linux
command
line?
Can use Linux
applications
with a GUI?
Internet
Speed
Requirements
Section 3: PowerShell Windows Yes No Low
Section 4: Mac Terminal Mac OS X Yes No Low
Section 5: VS Code either Yes No Very Low
Section 6: X2Go either Yes Yes Medium
Section 7: MobaXterm Windows Yes Yes High
Section 8: Mac Terminal w/ XQuartz Mac OS X Yes Yes High
Section 9: VS Code w/ XQuartz Mac OS X Yes Yes High
We recommend at least trying to use PowerShell or the Mac Terminal as your first attempt at remote
access to ensure your connection is working. Using PowerShell or the Mac Terminal can be quite
primitive though, so we recommend primarily using these as backup options throughout the course
in case you are having trouble with the other options. We strongly recommend using VS Code as
your primary remote access option for code development, and then using X2Go only if you need
to use a Linux application with a GUI. MobaXterm, Mac Terminal with XQuartz, or VS Code with
XQuartz are also perfectly fine options, but they are only feasible if you are on a relatively high-speed
internet connection to the ecelinux servers (i.e., on the Campus network).
2. Connecting to the Cornell VPN
If you are logging into the ecelinux servers from on campus (i.e., using the Cornell wired or wireless
network), then you do not need to enable the Cornell virtual private network (VPN). However, if
you are off campus, then you will need to enable the Cornell VPN whenever you want to log into the
ecelinux servers. The VPN provides very secure access to all on-campus network resources. More
information about the Cornell VPN is available here:
• https://it.cornell.edu/cuvpn
3

ECE 4750 Computer Architecture Tutorial 0: Remote Access to ecelinux
Figure 1: Running the Cisco AnyConnect Client for Cornell VPN
Simply follow the instructions at the following link to install the Cisco VPN software for the appro-
priate operating system you use on your laptop/workstation:
• https://it.cornell.edu/articles/topics/2605/all/822
Once the Cornell VPN is installed, then connect to the Cornell VPN by following these instructions
and using your Cornell NetID and password:
• https://it.cornell.edu/articles/topics/2605/all/823
The Cornell VPN uses the Cisco AnyConnect Client, and Figure 1 illustrates running the client.
3. Remote Access via PowerShell
PowerShell is part of Windows OS, and it enables interacting with your Windows OS system from
the command line (i.e., a powerful text-based environment where users type commands to manip-
ulate files and directories and execute applications). PowerShell also enables remotely accessing
other systems (e.g., the ecelinux servers) via the command line using SSH, a highly secure net-
work protocol and associated client/server program. PowerShell will enable you to log into the
ecelinux servers and to then manipulate files and directories and execute applications remotely on
the ecelinux servers using the Linux command line. Note that PowerShell does not enable using
Linux applications with a GUI. If you need to use a Linux application with a GUI, you will need to
choose a different remote access option (e.g., X2Go described in Section 6 or MobaXterm described
in Section 7).
3.1. Starting and Configuring PowerShell
First, if you are off campus, then you must be connected to the Cornell VPN before attempting to use
X2Go to access the ecelinux servers (see Section 2). To start PowerShell click the Start menu then
choose Windows PowerShell > Windows PowerShell (you might need to look under _All Programs >
Accessories_), or click the Start menu, type PowerShell, and choose Windows PowerShell.
The default blue background for PowerShell can be a little annoying. You can change the background
to black or white by right clicking on the PowerShell window’s title bar and then choose Properties >
Colors, select Screen Background, click the black or white color, and click OK.
3.2. Logging into ecelinux Servers with PowerShell
After starting PowerShell, type in the following command at the prompt to log into the ecelinux
servers using SSH.
4

ECE 4750 Computer Architecture Tutorial 0: Remote Access to ecelinux
Figure 2: PowerShell After Logging Into ecelinux Servers
% ssh [email protected]
Replace netid with your Cornell NetID in the command above. You should not enter the % character.
We use the % character to indicate what commands we should enter on the command line. Execut-
ing the command will prompt you to enter your Cornell NetID password, and then you should be
connected to the ecelinux servers.
The very first time you log into the ecelinux servers you may see a warning like this:
The authenticity of host ’ecelinux.ece.cornell.edu (128.253.51.206)’ can’t be established.
ECDSA key fingerprint is SHA256:smwMnf9dyhs5zW5I279C5oJBrTFc5FLghIJMfBR1cxI.
Are you sure you want to continue connecting (yes/no)?
The very first time you log into the ecelinux servers it is okay to enter yes, but from then on if you
continue to receive this warning please contact the course staff.
Once you have opened a terminal, the very first thing you need to do after logging into the ecelinux
servers is source the course setup script. This will ensure your environment is setup with everything
you need for working on the laboratory/programming assignments. Enter the following command
on the command line:
% source setup-ece4750.sh
Again, you should not enter the % character. You should now see a blue ECE 4750 in your prompt
which means your environment is setup for the course. Figure 2 shows what your prompt should
look like if you have sourced the course setup script. See Section 11 for more on how to automatically
source the setup script every time you log into the ecelinux servers, and see Section 10 for more on
text editors you can use in the course.
5
ECE 4750 Computer Architecture Tutorial 0: Remote Access to ecelinux
4. Remote Access via Mac Terminal
Mac Terminal is part of Mac OS X, and it enables interacting with your Mac OS X system from the
command line (i.e., a powerful text-based environment where users type commands to manipulate
files and directories and execute applications). Mac Terminal also enables remotely accessing other
systems (e.g., the ecelinux servers) via the command line using SSH, a highly secure network pro-
tocol and associated client/server program. Mac Terminal will enable you to log into the ecelinux
servers and to then manipulate files and directories and execute programs remotely on the ecelinux
servers using the Linux command line. Note that Mac Terminal (by default) does not enable using
Linux applications with a GUI. If you need to use a Linux application with a GUI, you will need
to choose a different remote access option (e.g., X2Go described in Section 6 or Mac Terminal with
XQuartz described in Section 8).
4.1. Starting and Configuring Mac Terminal
First, if you are off campus, then you must be connected to the Cornell VPN before attempting to use
X2Go to access the ecelinux servers (see Section 2). To start Mac Terminal go to your Applications
folder and choose Utilities > Terminal.app, or open Spotlight, type Terminal, and press enter.
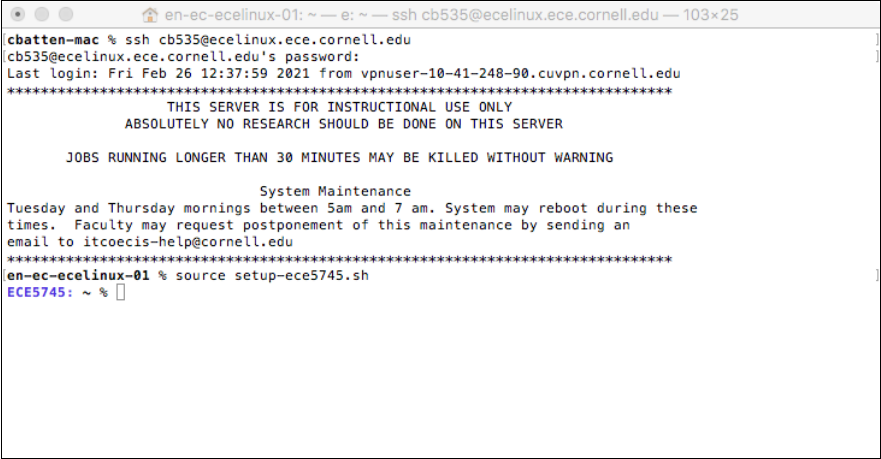
4.2. Logging into ecelinux Servers with Mac Terminal
After starting Mac Terminal, type in the following command at the prompt to log into the ecelinux
servers using SSH.
% ssh [email protected]
Replace netid with your Cornell NetID in the command above. You should not enter the % character.
We use the % character to indicate what commands we should enter on the command line. Execut-
Figure 3: Mac Terminal After Logging Into ecelinux Servers
6
ECE 4750 Computer Architecture Tutorial 0: Remote Access to ecelinux
ing the command will prompt you to enter your Cornell NetID password, and then you should be
connected to the ecelinux servers.
The very first time you log into the ecelinux servers you may see a warning like this:
The authenticity of host ’ecelinux.ece.cornell.edu (128.253.51.206)’ can’t be established.
ECDSA key fingerprint is SHA256:smwMnf9dyhs5zW5I279C5oJBrTFc5FLghIJMfBR1cxI.
Are you sure you want to continue connecting (yes/no)?
The very first time you log into the ecelinux servers it is okay to enter yes, but from then on if you
continue to receive this warning please contact the course staff.
Once you have opened a terminal, the very first thing you need to do after logging into the ecelinux
servers is source the course setup script. This will ensure your environment is setup with everything
you need for working on the laboratory/programming assignments. Enter the following command
on the command line:
% source setup-ece4750.sh
Again, you should not enter the % character. You should now see a blue ECE 4750 in your prompt
which means your environment is setup for the course. Figure 3 shows what your prompt should
look like if you have sourced the course setup script. See Section 11 for more on how to automatically
source the setup script every time you log into the ecelinux servers, and see Section 10 for more on
text editors you can use in the course.
5. Remote Access via VS Code
While combining PowerShell (see Section 3) or Mac Terminal (see Section 4) with a text-based editor
such as Micro can certainly work, it is not the most productive development setup. We strongly rec-
ommend using VS Code as your primary remote access option for code development (this Section),
and then using X2Go only if you need to use a Linux application with a GUI (see Section 6). VS Code
offers a nice balance of productive features while also working well with moderate internet speeds.
VS Code uses a unique approach where the GUI interface runs completely on your local laptop/-
workshop and then automatically handles copying files back and forth between your local laptop/-
workshop and the ecelinux servers. VS Code is portable across many operating systems and has a
thriving ecosystem of extensions and plugins enabling it to function as a full-featured IDE for lan-
guages from C to Javascript. More information about VS Code is here:
• https://code.visualstudio.com
• https://code.visualstudio.com/docs
5.1. Installing VS Code on Your Laptop/Workstation
You can download VS Code by simply going to the main VS Code webpage:
• https://code.visualstudio.com
There should be an obvious link that says “Download for Windows” or “Download for Mac”. Click
on that link. On Mac OS X, you will need to drag the corresponding Visual Student Code.app to your
Applications folder.
7
ECE 4750 Computer Architecture Tutorial 0: Remote Access to ecelinux
5.2. Starting and Configuring VS Code
First, if you are off campus, then you must be connected to the Cornell VPN before attempting to use
X2Go to access the ecelinux servers (see Section 2). Start by opening VS Code. The exact way you
do this will depend on whether you are using a Windows or Mac OS X laptop/workstation.
The key to VS Code is installing the correct extensions. You will need extensions for the C/C++,
Python, and Verilog languages in this course. We also want to install a special extension which
will enable remotely accessing the ecelinux servers using SSH. Choose View > Extensions from the
menubar. Enter the name of the extension in the “Search Extensions in Marketplace” and then click
the blue Install button. Here are the names of the extensions to install:
• Remote - SSH (use the one from Microsoft)
• C/C++ (use the one from Microsoft)
• Python (use the one from Microsoft)
• Verilog (use the one from mshr-h)
For the C/C++, Python, and Remote - SSH extensions it is critical to choose the extension developed
by Microsoft. You should see the name Microsoft in the extension description. Figure 4 illustrates
how to install these extensions.
5.3. Logging into ecelinux Servers with VS Code
After starting VS Code, choose View > Command Palette from the menubar. Enter the following com-
mand in the command palette:
Remote-SSH: Connect Current Window to Host..
As you start typing matching commands will be displayed and you can just click the command when
you see it. VS Code will then ask you to Select configured SSH host or enter user@host, and you should
enter the following:
Replace netid with your Cornell NetID in the command above. If you are on a Windows laptop/-
workstation, then you may see a pop-up which stays that the Windows Defender Firewall as blocked
some features of this app. This is not a problem. Simply click Cancel.
You might also see a drop down which asks you to choose the operating system of the remote server
with options like Linux and Windows. Choose Linux.
Finally, the very first time you log into the ecelinux servers you may see a warning like this:
"ecelinux.ece.cornell.edu" has fingerprint
"SHA256:smwMnf9dyhs5zW5I279C5oJBrTFc5FLghIJMfBR1cxI".
Are you sure you want to continue?
Continue
Cancel
The very first time you log into the ecelinux servers it is okay to enter yes, but from then on if you
continue to receive this warning please contact the course staff.
Hopefully, VS Code will now prompt you to enter your Cornell NetID password, and then you
should be connected to the ecelinux servers.
8

ECE 4750 Computer Architecture Tutorial 0: Remote Access to ecelinux
(a) C/C++ Extension
(c) Verilog Extension
(b) Python Extension
(d) Remote - SSH Extension
Figure 4: Installing Extensions in VS Code
Also the very first time you log into the ecelinux servers you will see a pop up dialog box in the
lower right-hand corner which says Setting up SSH host ecelinux.ece.cornell.edu (details) Initializing.... It
might take up to a minute for everything to be setup; please be patient! Once the pop up dialog box
goes away and you see SSH: ecelinux.ece.cornell.edu in green in the lower left-hand corner of VS Code
then you know you are connected to the ecelinux servers.
The final step is to make sure your extensions for C/C++, Python, and Verilog are also installed on
the server. Choose View > Command Palette from the menubar. Search for the same C/C++, Python,
and Verilog extensions we installed earlier. When you find these extensions instead of saying Install
it should now say Install in SSH: ecelinux.ece.cornell.edu. Install all three language extensions on the
ecelinux servers.
9

ECE 4750 Computer Architecture Tutorial 0: Remote Access to ecelinux
Figure 5: Logging into ecelinux Servers with VS Code
5.4. Using VS Code
VS Code includes an integrated file explorer which makes it very productive to browse and open
files. Choose View > Explorer from the menubar, and then click on Open Folder. VS Code will then ask
you to Open File Or Folder with a default of /home/netid. Click OK.
You might see a pop-up which asks you Do you trust the authors of the files in this folder? Since you will
only be browsing your own files on the ecelinux server, it is fine to choose Yes, I trust the authors.
This will reload VS Code, and you should now you will see a file explore in the left sidebar. You can
easily browse your directory hierarchy, open files by clicking on them, create new files, and delete
files.
VS Code includes an integrated terminal which will give you access to the Linux command line on
the ecelinux servers. Choose Terminal > New Terminal from the menubar. You should see the same
kind of Linux command line prompt that you saw when using either PowerShell or Mac Terminal.
The very first thing you need to do after logging into the ecelinux servers is source the course setup
script. This will ensure your environment is setup with everything you need for working on the
laboratory/programming assignments. Enter the following command on the command line:
% source setup-ece4750.sh
Again, you should not enter the % character. You should now see a blue ECE 4750 in your prompt
which means your environment is setup for the course. See Section 11 for more on how to automati-
cally source the setup script every time you log into the ecelinux servers.
To experiment with VS Code, we will first grab a text file using the wget command. The next tutorial
discusses this command in more detail. Type the following command in the VS Code integrated
terminal.
% wget http://www.csl.cornell.edu/courses/ece4750/overview.txt
10

ECE 4750 Computer Architecture Tutorial 0: Remote Access to ecelinux
Figure 6: Typical VS Code Session with Terminal, Open File, and File Explorer
You can open a file in the integrated text editor using the code command like this:
% code overview.txt
Figure 6 shows what VS Code should look like if you have sourced the course setup script and
opened the overview.txt file. Notice how the overview.txt file opened in a new tab at the top
and the terminal remains at the bottom. This enables you to have easy access to editing files and the
Linux command line at the same time.
5.5. Troubleshooting Remote Access via VS Code
There may be issues where sometimes VS Code just keeps asking you for your password or VS Code
just hangs when you try and connect to the ecelinux servers. This might mean VS Code is getting
wedged. You can definitely ask the course staff to help, but you can also try to fix it on your own.
One thing to try is to kill the VS Code server on the host. Choose View > Command Palette from the
menubar. Enter the following command in the command palette:
Remote-SSH: Kill VS Code Server on Host...
Another thing to try is to delete the .vscode-server directory on the sever. Of course, how can
you delete this directory if you cannot use VS Code to access the ecelinux servers? You can use
PowerShell (see Section 3) or Mac Terminal (see Section 4) to log into the ecelinux servers.
Once you have gained access to the Linux command line on the ecelinux servers using either Pow-
erShell or Mac Terminal, then you can delete the .vscode-server directory like this:
% rm -rf .vscode-server
11
ECE 4750 Computer Architecture Tutorial 0: Remote Access to ecelinux
Be very careful with the rm command since it can permanently delete files!
Note that using the Remote-SSH: Add new SSH host... option does not always seem to work
on Microsoft Windows laptops/workstations. This is why we recommend just using Remote-SSH:
Connect Current Window to Host... directly.
Sometimes VS Code can take a very long time to save a C/C++ file. This is usually because VS Code
is trying to auto-format the C/C++ file on the ecelinux servers. To turn off auto-formatting, open
the VS Code settings menu. On Windows, choose File > Preferences > Settings from the menubar.
On Mac OS X, choose Code > Preferences > Settings from the menubar. Click on Text Editor and then
Formatting. Make sure Format On Save is not checked.
6. Remote Access via X2Go
The X2Go remote access option is useful when you want to run a Linux application with a GUI. So
for example, if you want to look at waveforms using GTKWave, look at layout using KLayout, or
look at your chip using Cadence Innovus. X2Go is a separate application that you install on your
local laptop or workstation. Then you setup a session, and you can use X2Go to log into the ecelinux
servers. X2Go will provide students with a Linux remote desktop on the ecelinux server and enable
students to open terminals for working at the command line, use text editors for developing code,
and run other GUI programs for analyzing and/or evaluating your code. More information about
X2Go is available here:
• https://wiki.x2go.org
6.1. Installing X2Go on Your Laptop/Workstation
On Mac OS X, you will need to install XQuartz first. Go to this page, download the DMG, and then
install XQuartz.
• https://www.xquartz.org
After installing, you should reboot your laptop/workstation and then try starting XQuartz. The very
first time you might need to right click on the XQuartz application and explicitly choose open from
the pop-up menu. This tells Mac OS X that you really do want to run this application even though
you downloaded it from the internet. After doing this once, you can open XQuartz just by double
clicking it, and/or X2Go will start it automatically if necessary.
The next step for both Windows and Mac OS X is to download and install the X2Go client for the
appropriate operating system you use on your laptop/workstation. Here are direct links for the
Windows and Mac OS X operating systems:
• Windows: http://code.x2go.org/releases/X2GoClient_latest_mswin32-setup.exe
• Mac OS X: http://code.x2go.org/releases/X2GoClient_latest_macosx_10_13.dmg
For more information about the installation process, for versions of the X2Go client that can work on
older operating systems, or for versions of the X2Go client that work on Linux please see the X2Go
documentation:
• https://wiki.x2go.org/doku.php/download:start
12

ECE 4750 Computer Architecture Tutorial 0: Remote Access to ecelinux
Figure 7: Configuring X2Go to Access ecelinux Servers
13
ECE 4750 Computer Architecture Tutorial 0: Remote Access to ecelinux
6.2. Starting and Configuring X2Go
First, if you are off campus, then you must be connected to the Cornell VPN before attempting to use
X2Go to access the ecelinux servers (see Section 2). Start by opening the X2Go Client. The exact way
you do this will depend on whether you are using a Windows or Mac OS X laptop/workstation.
On Mac OS X, the very first time you might need to right click on the X2Go application and explicitly
choose open from the pop-up menu. This tells Mac OS X that you really do want to run this appli-
cation even though you downloaded it from the internet. After doing this once, you can open X2Go
just by double clicking it, and/or X2Go will start it automatically if necessary.
After starting X2Go for the first time, a window will appear to set up a new session. Configure the op-
tions on the Session and Media tabs as shown in Figure 7, making sure you carefully change every cir-
cled field. In the Session tab, for Session name enter ecelinux; for Host enter ecelinux.ece.cornell.edu;
for Login enter your NetID; and choose XFCE under Session type. In the Media tab, make sure Enable
sound support and Client side printing support are not checked. Once you have configured all settings,
click OK.
6.3. Logging into ecelinux Servers with X2Go
After starting X2Go, enter ecelinux at the prompt as shown in Figure 8, press enter/return, and enter
your NetID password. If you are asked to trust a certificate for the ecelinux servers, you must click
yes. If you receive any kind of warnings on Windows related to firewall configuration you should
just cancel that warning.
Once you have successfully logged into the ecelinux servers, you should see the Linux remote
desktop shown in Figure 9. Note that the Linux remote desktop is running on the ecelinux server,
so anything you do in the Linux remote desktop is actually happening on the server and not on your
local laptop/workstation.
To get to the Linux command line you need to open a new terminal on the Linux remote desktop.
You can open a new terminal by choosing Applications > Terminal Emulator from the Applications menu
in the upper-left corner of the Linux remote desktop.
Once you have opened a terminal, the very first thing you need to do after logging into the ecelinux
servers is source the course setup script. This will ensure your environment is setup with everything
you need for working on the laboratory/programming assignments. Enter the following command
on the command line:
% source setup-ece4750.sh
You should not enter the % character. We use the % character to indicate what commands we should
enter on the command line. You should now see a blue ECE 4750 in your prompt which means your
environment is setup for the course. Figure 10 shows what your prompt should look like if you have
sourced the course setup script. See Section 11 for more on how to automatically source the setup
script every time you log into the ecelinux servers, and see Section 10 for more on text editors you
can use in the course.
6.4. Logging out of ecelinux Servers with X2Go
When you are finished working on the ecelinux servers you need to explicitly log out. Choose Ap-
plications > Log Out from the Applications menu in the upper-left corner of the Linux remote desktop.
Make sure Save session for future logins is not checked. Then click on Log out to cleanly log out from
14

ECE 4750 Computer Architecture Tutorial 0: Remote Access to ecelinux
Figure 8: Logging into ecelinux Servers with X2Go
Figure 9: Linux Remote Desktop on ecelinux Servers with X2Go
15

ECE 4750 Computer Architecture Tutorial 0: Remote Access to ecelinux
Figure 10: X2Go Terminal After Logging into ecelinux Servers
Figure 11: X2Go Logout Dialog Box on ecelinux Servers
16
ECE 4750 Computer Architecture Tutorial 0: Remote Access to ecelinux
the ecelinux servers (see Figure 11). Obviously, you should save all of you work frequently and
before you log out of the ecelinux servers.
6.5. Troubleshooting Remote Access via X2Go
The above instructions should work assuming you have a default .bashrc file on the ecelinux
servers. However, if you have taken other courses that use the ecelinux servers, then your .bashrc
may be setup in such a way that it prevents X2Go from connecting to the ecelinux servers. The key
is that X2Go does not like any output printed to the console when you log into the ecelinux servers.
So if anything in your .bashrc uses echo or print statements that can cause connections to hang.
You can use Windows PowerShell or Mac Terminal to remotely access the ecelinux servers to fix
this issue. Once you have used Windows PowerShell or Mac Terminal to get to the Linux command
line, you can use the Micro text editor to comment out everything in your .bashrc file. Then try
remote access via X2Go again. If you are now able to connect, you can try uncommenting parts of
your .bashrc file to find what setup actions are the culprit.
Note that copy-and-paste from your local laptop to/from X2Go may not work. You might be able to
explicitly use the menus to copy-and-paste. This is a known issue without any real work arounds.
If you are using Mac OS X, and you see â
˘
AIJSession startedâ
˘
A
˙
I immediately followed by a â
˘
AIJCon-
nection timeout, abortingSessionâ
˘
A
˙
I message make sure you have upgraded to the latest version of
XQuartz.
7. Remote Access via MobaXterm
Section 3 described how to access the ecelinux servers using PowerShell, but this option does not
permit using a Linux application with a GUI. If you have not tried the remote access option described
in Section 3 then do that now. Linux uses the X11 client/server system to manage GUI applications,
so to use a Linux application with a GUI we need to setup an X11 client/server. On Windows we will
install the MobaXterm client/server system. Once MobaXterm is installed then we can use it to log
into the ecelinux servers and start GUI applications. Note that we actually recommend using X2Go
as described in Section 6 if you want to use a Linux application with a GUI, but some students
may prefer MobaXterm.
7.1. Installing MobaXterm on Your Windows Laptop/Workstation
Go to this page, download the installer, then install MobaXterm.
• http://mobaxterm.mobatek.net/download-home-edition.html
We recommend using the Installer Edition. Right click on the downloaded ZIP archive and choose
Extract all. Then double click on MobaXterm_installer, click Next to start the installation, agree to the
EULA and click Next, click Next to install in the default location, click Install to start the installation,
and click Finish to finish the installation.
7.2. Starting and Configuring MobaXterm
First, if you are off campus, then you must be connected to the Cornell VPN before attempting to use
MobaXterm to access the ecelinux servers (see Section 2). To start MobaXterm click the Start menu
then choose All Programs > MobaXterm > MobaXterm, or click the Start menu, type MobaXterm, and
choose MobaXterm.
17

ECE 4750 Computer Architecture Tutorial 0: Remote Access to ecelinux
Figure 12: MobaXterm After Logging Into ecelinux Servers and Starting xclock
We recommend setting the SSH “keep alive signal” to avoid dropping your connection if you are
inactive for a certain amount of time. After starting MobaXterm, choose Settings > Configuration from
the menu, select the SSH tab, and make sure the SSH keepalive option is checked.
7.3. Logging into ecelinux Servers with MobaXterm
After starting MobaXterm, type the following to configure your local laptop/workstation to avoid
dropping your connection if you are inactive for a certain amount of time.
% echo "Host *.ece.cornell.edu" >> ~/.ssh/config
% echo " ServerAliveInterval 180" >> ~/.ssh/config
Then type in the following command at the prompt to log into the ecelinux servers using SSH.
% ssh -Y [email protected]
Replace netid with your Cornell NetID in the command above. This is very similar to what was
discussed in Section 3 with the key difference being the -Y command line option which enables the
X11 client/server system. This system means when you start a GUI application on the ecelinux
18
ECE 4750 Computer Architecture Tutorial 0: Remote Access to ecelinux
server, the GUI application is displayed on your laptop/workstation, but the GUI application itself
is running on the ecelinux servers.
As always, once you have opened a terminal, the very first thing you need to do after logging into
the ecelinux servers is source the course setup script.
% source setup-ece4750.sh
You should now see a blue ECE 4750 in your prompt which means your environment is setup for the
course. See Section 11 for more on how to automatically source the setup script every time you log
into the ecelinux servers, and see Section 10 for more on text editors you can use in the course.
To test out the X11 client/server system, we will start a very basic GUI analog clock application on
the ecelinux server. Type in the following command at the prompt to start the clock application.
% xclock
Hopefully, you should see a window pop up on your local laptop/workstation displaying an analog
clock window. It is critical to understand that while the GUI application is being displayed on your
local laptop/workstation, the GUI application itself is running on the ecelinux servers. Figure 12
shows what your prompt should look like if you have sourced the course setup script and what the
analog clock window looks like.
After logging into an ecelinux server you will notice that a sidebar appears on the left that shows
you the files in your home directory. You can drag files to/from the sidebar and the desktop to easily
move files to/from your local Windows laptop/workstation and the ecelinux servers. To hide the
sidebar choose View > Show/hide sidebar from the menu.
8. Remote Access via Mac Terminal with XQuartz
Section 4 described how to access the ecelinux servers using Mac Terminal, but this option does
not permit using a Linux application with a GUI. If you have not tried the remote access option
described in Section 4 then do that now. Linux uses the X11 client/server system to manage GUI
applications, so to use a Linux application with a GUI we need to setup an X11 client/server. On
Mac OS X we will install the XQuartz client/server system. Once XQuartz is installed then we can
use Mac Terminal with a slightly different command line to log into the ecelinux servers. Note
that we actually recommend using X2Go as described in Section 6 if you want to use a Linux
application with a GUI, but some students may prefer Mac Terminal with XQuartz.
8.1. Installing XQuartz on Your Mac OS X Laptop/Workstation
Go to this page, download the DMG, and then install XQuartz.
• https://www.xquartz.org
After installing, you should reboot your laptop/workstation and then try starting XQuartz. The very
first time you might need to right click on the XQuartz application and explicitly choose open from
the pop-up menu. This tells Mac OS X that you really do want to run this application even though
you downloaded it from the internet. After doing this once, you can open XQuartz just by double
clicking it, and/or XQuartz will start automatically when necessary.
19
ECE 4750 Computer Architecture Tutorial 0: Remote Access to ecelinux
8.2. Starting and Configuring Mac Terminal
First, if you are off campus, then you must be connected to the Cornell VPN before attempting to use
X2Go to access the ecelinux servers (see Section 2). To start Mac Terminal go to your Applications
folder and choose Utilities > Terminal.app, or open Spotlight, type Terminal, and press enter.
We recommend setting the SSH “keep alive signal” to avoid dropping your connection if you are
inactive for a certain amount of time. After starting Mac Terminal, type the following to configure
your local laptop/workstation to avoid dropping your connection if you are inactive for a certain
amount of time.
% echo "Host *.ece.cornell.edu" >> ~/.ssh/config
% echo " ServerAliveInterval 180" >> ~/.ssh/config
You should only need to do this once.
8.3. Logging into ecelinux Servers with Mac Terminal
After starting Mac Terminal, type in the following command at the prompt to log into the ecelinux
servers using SSH.
% ssh -Y [email protected]
Replace netid with your Cornell NetID in the command above. This is very similar to what was
discussed in Section 4 with the key difference being the -Y command line option which enables the
X11 client/server system. This system means when you start a GUI application on the ecelinux
server, the GUI application is displayed on your laptop/workstation, but the GUI application itself
is running on the ecelinux servers.
As always, once you have opened a terminal, the very first thing you need to do after logging into
the ecelinux servers is source the course setup script.
% source setup-ece4750.sh
You should now see a blue ECE 4750 in your prompt which means your environment is setup for the
course. See Section 11 for more on how to automatically source the setup script every time you log
into the ecelinux servers, and see Section 10 for more on text editors you can use in the course.
To test out the X11 client/server system, we will start a very basic GUI analog clock application on
the ecelinux server. Type in the following command at the prompt to start the clock application.
% xclock
Hopefully, you should see a window pop up on your local laptop/workstation displaying an analog
clock window. It is critical to understand that while the GUI application is being displayed on your
local laptop/workstation, the GUI application itself is running on the ecelinux servers. Figure 13
shows what your prompt should look like if you have sourced the course setup script and what the
analog clock window looks like.
9. Remote Access via VS Code with XQuartz
If you have been able to successfully access the ecelinux servers using both VS Code (Section 5)
and Mac Terminal with XQuartz (Section 8), then there is a way to combine the benefits of these two
20

ECE 4750 Computer Architecture Tutorial 0: Remote Access to ecelinux
Figure 13: Mac Terminal with XQuartz After Logging Into ecelinux Servers and Starting xclock
approaches (although this is obviously only possible when using a Mac laptop/workstation). They
key is to setup X11 forwarding in VS Code so that when you try to launch a GUI application from
the VS Code terminal it will use XQuartz. This way you do not need to use the Max Terminal.
To make this work, you need to make sure you have the following entry in your ‘$HOME/.ssh/config‘
file on your local laptop:
Host ecelinux.ece.cornell.edu
HostName ecelinux.ece.cornell.edu
ForwardX11 yes
ForwardX11Trusted yes
User cb535
Then log out and log back into the ecelinux servers and try the following command in a VS Code
terminal to start the clock application.
% xclock
Hopefully, you should see a window pop up on your local laptop/workstation displaying an analog
clock window.
21
ECE 4750 Computer Architecture Tutorial 0: Remote Access to ecelinux
10. Linux Text Editors
Once you have successfully logged into the ecelinux servers, gained access to the Linux command
line, and sourced the setup script, one of the first things you will want to do is choose a text editor for
editing code. If you have not gone through one of the remote access options described in Sections 3–
8 then do that now. There are two kinds of editors: text-based editors and GUI-based editors. The
text-based editors work by opening files through the command line and then using the keyboard to
navigate the file system, open files, save files, search within files, etc. The GUI-based editors work by
providing a graphical user interface so that the user can use a mouse to interact with the editor. If
you have chosen to use the PowerShell (see Section 3) or Mac Terminal (see Section 4) remote access
options then you must use a text-based editor (e.g., Micro). If instead you have used one of the other
remote access options then you can use either a text-based editor or a GUI-based editor. Note that if
you have chosen to use the VS Code remote access option then there is no need to use a Linux text
editor; you can directly use VS Code to remotely edit files on the ecelinux servers as described in
Section 5.
To experiment with these editors, we will first grab a text file using the wget command. The next
tutorial discusses this command in more detail.
% wget http://www.csl.cornell.edu/courses/ece4750/overview.txt
10.1. Using the Micro Text Editor
Micro is a simple text-based editor installed on the ecelinux servers. The editor is easy to learn and
use. More information about Micro is here:
• https://micro-editor.github.io
You can start Micro by typing the command micro at the Linux command line and optionally speci-
fying the filename you want to view and edit.
% micro overview.txt
Use the arrow keys to move the cursor position. Notice that the editor specifies most of the useful
commands at the bottom of the terminal screen. The symbol ˆ indicates the CONTROL key. To type
any text you want, just move the cursor to the required position and use the keyboard. To save your
changes press CONTROL+S (i.e., press the CONTROL key and the S key at the same time) and press the
<ENTER> key after specifying the filename you want to save to. You can quit by pressing CONTROL+Q.
Use CONTROL+G for help.
10.2. Using the Geany Text Editor
Geany (pronounced like “genie”) is a simple GUI-based editor installed on the ecelinux servers.
Actually, Geany can also be used as an integrated development environment, but in this course we
will only use it as a basic text editor. More information about Geany is here:
• https://www.geany.org
You can start Geany by typing the command geany at the Linux command line and optionally spec-
ifying the filename you want to view and edit.
% geany overview.txt &
22
ECE 4750 Computer Architecture Tutorial 0: Remote Access to ecelinux
This should open a new GUI window. If you get an error about your display, you probably do not
have your X11 client/server system setup correctly. Please revisit either Sections 6, 7, or 8 depending
on which remote access option you are using. Note that we have added a & symbol at the end of
the command. This special symbol starts the graphical program in the background enabling you to
continue to use the terminal. Navigating, editing, and saving files is very simple in Geany.
See Figure 14 for a screenshot of a typical Geany session. Geany has a relatively straight-forward
GUI. You can open and save files using the File menu or toolbar. We recommend you take the fol-
lowing steps to configure Geany for use in this course:
• Make sure View > Show message window is unchecked. We will not need the message window in
this course.
• Choose Edit > Preferences from the menu, then Editor > Features, and set the Line breaking column
to be 74. Then click OK.
• Choose Edit > Preferences from the menu, then Editor > Indentation, and set the Width to be two
and the Type to be Spaces. Then click OK.
• Choose Tools > Plugin Manager from the menu, and make sure File Browser and Split Window are
checked. Then click Close.
• Choose Edit > Preferences from the menu, then Interface > Interface, and set the font family and size
next to Editor based on your own personal preference (or leave the default for now).
After completing these configuration step, the side panel includes an integrated file browser. You
can display the file browser by clicking on the Files tab at the top of the sidebar. If the Files tab is not
visible, you may need to click on the small right/left arrows at either side of the tabs (see Figure 14).
Double-clicking on a file in the file browser will open the file in a new tab.
Geany has a nice feature where it can enable splitting the window into two side-by-side panels with
different files opened in each panel. To turn on split windowing, choose Tools > Split Window > Side
by Side from the menu. Then click on the small downward arrow in the right-hand panel and choose
an open file to display in this extra panel. You can also of course just open two Geany windows.
Having both your source and testing code open at the same, side-by-side, can be very powerful.
10.3. Other Editors
While Micro and Geany editors are easy to learn, students that anticipate using Linux in the future
beyond this course might want to use a more powerful text-based editor such as emacs or vim. Both
also have GUI equivalents. By default emacs will start the GUI, while using the -nw command line
option will enable non-graphical mode. vim is purely non-graphical, but gvim is the graphical equiv-
alent. It is beyond the scope of this tutorial to teach you the usage of these editors, but most advanced
Linux users use one of these more powerful text editors for development.
11. Sourcing the Course Setup Script with Auto Setup
Each of the previous sections have demonstrated how to remotely access the ecelinux servers, get
to the Linux command line, and source the course setup script. Again, you must source the course
setup script before doing any work related to this course! The course setup script configures every-
thing so you have the right environment to work on the laboratory/programming assignments.
Since it can be tedious to always remember to source the course setup script, you can also use auto
setup which will automatically source the course setup for you when you open a terminal. Note that
23

ECE 4750 Computer Architecture Tutorial 0: Remote Access to ecelinux
File
browser
Tab to
display
file
browser
Tabs for opened files
Arrows
to show
more
tabs
Figure 14: Geany GUI-Based Editor
if the environment for ECE 4750 conflicts with the environment required by a different course then
you will need to manually source the setup script when you are working on this course. Enter the
following command on the command line to use auto setup:
% source setup-ece4750.sh --enable-auto-setup
Now completely logout of the ecelinux servers then log back in and get to the Linux command line.
The exact way to do this depends on which remote access option you using. You should see ECE
4750 in the prompt meaning your environment is automatically setup for the course. If at anytime
you need to disable auto setup you can use the following command:
% source setup-ece4750.sh --disable-auto-setup
Again, if for any reason running the setup script prevents you from using tools for another course,
you cannot use the auto setup. You will need to run the setup script manually every time you want
to work on a laboratory/programming assignment for this course.
24
ECE 4750 Computer Architecture Tutorial 0: Remote Access to ecelinux
Acknowledgments
This tutorial was developed for the ECE 2400 Computer Systems Programming, ECE 4750 Computer
Architecture, and ECE 5745 Complex Digital ASIC Design courses at Cornell University by Christo-
pher Batten.
25
