

2
Updated March 2017
Contents
Introduction 6
Intended Audience 6
Documentation Feedback 6
Obtaining Technical Assistance 6
Chapter 1. MimioTeach 7
Calibration Issues 7
Stylus Issues 10
Mounting MimioTeach to a Whiteboard 12
Pairing MimioTeach 12
Chapter 2. MimioProjector 240, 240i 15
MimioProjector Installation 15
Replacing the Bulb in the MimioProjector 15
Replacing the Filter in the MimioProjector 16
Setting Up the MimioProjector 16
Making a Non-Interactive MimioProjector Interactive 16
Projection Issues 17
Interactivity Issues 19
Chapter 3. MimioProjector 280, 280i, 280T 22
Projection Issues 22
Interactivity Issues 24
Chapter 4. Dallas WX35nxt 27
Lighting Issues 27
Projection Issues 27
Chapter 5. P8 WX31nxt 29
Lighting Issues 29
Projection Issues 29
Interactivity Issues 30
Chapter 6. P10 WX35nxt 33
Lighting Issues 33
Projection Issues 33
Interactivity Issues 34
Chapter 7. P12 Projector (non-interactive model) 37
Lighting Issues 37
Projection Issues 37

3
Updated March 2017
Chapter 8. P12 Projector (pen interactive model) 40
Lighting Issues 40
Projection Issues 40
Interactivity Issues 42
Chapter 9. P12 Projector (laser/touch interactive model) 44
Lighting Issues 44
Projection Issues 44
Interactivity Issues 46
Chapter 10. ProColor 550h, 650h, and 700h
Interactive Flat Panel Displays 48
Imaging Issues 48
Interactivity Issues 51
Sound Issues 53
Installation Issues 54
Hotkey Issues 55
Chapter 11. MimioCapture 57
Problems Charging the Tray 57
Problems with Docked Pens 58
Mounting MimioCapture to a Non-Magnetic Whiteboard 59
Amber LEDs on Stylus and Pens/Eraser 60
Chapter 12. MimioView & MimioView HD 61
MimioView Issues 61
Securing the MimioView to a Surface 63
MimioView HD 65
Imaging Issues 65
Finding the Serial Number 66
Securing the MimioView HD to a Surface 67
Chapter 13. MimioVote 69
Station Issues 69
Handset Issues 70
Pairing MimioVote 72
Toolbar Add-in for PowerPoint 73
Chapter 14. The NEW MimioPad 76
Pairing the MimioPad and USB Wireless Receiver 76
Making MimioPad a Teacher or Student Pad 77
Chapter 15. MimioPad (1
st
Generation) 79
MimioPad Issues 79
Pairing the MimioPad and USB Wireless Receiver 80
Flashing Blue Light 81
Pop-Up Messages 82

4
Updated March 2017
Chapter 16. MimioMobile 85
Networking MimioMobile with MimioStudio 85
Making an iPad a Teacher or Student Pad 86
Chapter 17. MimioBoard 87
MimioBoard Installation 87
Replacing the MimioTeach on the MimioBoard 87
Chapter 18. Mimio Interactive Xi 89
Calibration Issues 89
Pairing Mimio Xi Wireless Components 89
Environmental Interference 91
Chapter 19. MimioStudio 93
MimioStudio Issues 93
Installation Issues – Windows 93
Installation Issues – Mac 96
Unknown Publisher Security Warning 97
Playing Multimedia Files 97
Adobe Flash Player 98
MimioStudio Recorder 98
MimioStudio ActivityWizard 99
Importing a Student List into MimioStudio Gradebook 101
Importing Word, PowerPoint, or PDF Documents 102
Display of an Imported PDF 104
Chapter 20. Frequently Asked Questions 105
Where can I find the latest version of MimioStudio software? 105
How do I export and import my MimioStudio Gallery? 105
Why should I export my Gallery? 106
How can I create my own activities using ActivityWizard? 106
Does MimioStudio software work on virtual desktops? 106
Can I import SMART and Promethean files? 107
What languages does MimioStudio software support? 107
How can I switch languages? 107
How can I use multiple MimioVote stations? 107
What is the maximum number of MimioVote handsets
you can use in a classroom? 108
How can I export MimioStudio Gradebook to my school’s
grade book system? 108
Is it possible to receive MimioStudio software updates
automatically? 109
Does the MimioStudio handwriting recognition feature work
in all languages? What about the text recognition feature? 109
How can I activate MimioStudio software? What if I lost my
product key? 110
Does the MimioView camera work with Skype? 110

5
Updated March 2017
Is it possible to deploy MimioStudio software across a
network to multiple machines? 111
How do I get the MimioMobile App? 112
How many iPad devices can I use as a MimioVote
handset? 112
How many devices (windows) can be used to
"collaborate"? 112
Does the MimioMobile app connect via the MimioHub
USB wireless receiver? 113
What are the Gestures in MimioStudio 10 software or later? 114

6
Updated March 2017
Introduction
Intended Audience
This guide is intended for anyone who owns, works with, or is responsible for
maintaining a Boxlight or Mimio hardware product and/or MimioStudio™
classroom software. You will find helpful hints and solutions for troubleshooting
problems that may arise. Also included, in Chapter 20, are the questions most
frequently encountered by Boxlight Customer Care.
Documentation Feedback
We hope you will find this guide helpful and we welcome your feedback. We
especially want to know if you find any information unclear, or if you feel that your
particular issue is not addressed. Please send your comments and questions to
customercare@boxlight.com.
Obtaining Technical Assistance
If you are unable to resolve an issue with the help of this guide, you may obtain
technical assistance by emailing us at customercare@boxlight.com.

7
Updated March 2017
Chapter 1. MimioTeach
Calibration Issues
Problem: The MimioTeach™ bar isn’t calibrating properly.
Symptoms: Missing calibration points. Strikes or missing lines in software.
Recommended Action(s):
There are a number of possible causes for this problem. Try the recommended
actions in the sequence given, until the problem is resolved.
1. Try This First:
Please charge the stylus for at least 8 hours, then try using it to see if you still
have the same issue. Make sure that you do not block the line of sight between
the bar and the stylus, and be careful to hold the stylus behind the silver band
without touching the buttons (see photo).
2. If the Problem Is Still Not Resolved:
Make sure you have the latest version of MimioStudio software. You can
download the latest version of MimioStudio software from the following link:
www.mimio.com/software
Once you have updated the software, plug the MimioTeach bar into the computer
with the USB cable so that the software update is also applied to the bar. While

8
Updated March 2017
the update is loading, you will see a blinking green power light on the bar. Once
the update is complete, the power light will go back to solid green.
Next, confirm the firmware on your MimioTeach device by opening MimioStudio
software and going to Tools Settings Classroom Devices. Click on
“MimioTeach” and you should see some information on the screen such as
1.6.2D and 1.8.4D. Please confirm this. Then try the MimioTeach device again
and see if it works.
3. If the Problem Is Still Not Resolved:
If you are still seeing the same issue, use a push-pin to remove the plastic covers
over the two microphones on your MimioTeach bar completely, making sure the
microphones themselves are not touched. Insert the push-pin in into each
microphone cover and pull up, but don’t let the push-pin touch the microphone.
Then try the MimioTeach device again.
4. If the Problem Is Still Not Resolved:
If the problem is still seen with both microphone covers off, try using another
MimioTeach stylus pen, if one is available. If a different stylus pen works, the
original stylus pen may no longer be functional. Please contact
[email protected] to check warranty status and understand your
replacement options.
5. If the Problem Is Still Not Resolved:
If a different stylus pen does not resolve the problem, you may have a bad
international power supply. Older MimioTeach systems that shipped
internationally had international power supplies (serial#0910C), which were found
Microphone

9
Updated March 2017
to be improperly shielded, causing noise. Check to see whether you have the
defective power supply (see photos).
Bad International Power Supply
Good Power Supply
The new MimioTeach systems incorporate additional shielding to make them
more immune to noisy power. A shielded bar will have a sticker with a letter, for
example “A” next to the serial number (see photo).

10
Updated March 2017
If you have a bad unit, contact [email protected] to receive a
replacement power supply.
6. If the Problem Is Still Not Resolved:
If you are still experiencing issues, try plugging in your MimioTeach device in
each of the ways below, one at a time. Check each plug-in method to see if that
resolves the issue.
a. Plug the MimioTeach device via USB cable directly to the computer.
b. Plug the MimioTeach device into a wall socket, using the power
supply, and run it wirelessly.
c. Run the MimioTeach device with batteries, and run it wirelessly.
7. If the Problem Is Still Not Resolved:
Please contact customercare@boxlight.com and explain that you have tried all
the above steps unsuccessfully. We can send you a MimioTeach diagnostic test
for further evaluation.
Stylus Issues
Problem: The MimioTeach stylus isn’t working.
Symptoms: Missing calibration points. Strikes or missing lines in software.
Recommended Action(s):
There are a number of possible causes for this problem. Try the recommended
actions in the sequence given, until the problem is resolved.
1. Try This First:
If you have access to another MimioTeach stylus, see if that one works with your
MimioTeach bar. Please charge your original stylus for at least 8 hours, then try
using it to see if you still have the same issue. Make sure that you do not block
the line of sight between the bar and the stylus, and be careful to hold the stylus
behind the silver band without touching the buttons (see photo).

11
Updated March 2017
2. If the Problem Is Still Not Resolved:
Make sure you have the latest version of MimioStudio software. You can
download the latest version of MimioStudio software from the following link:
www.mimio.com/software. Once you have updated the software, plug the
MimioTeach bar into the computer with the USB cable, so that the software
update is also applied to the bar. While the update is loading, you will see a
blinking green power light on the bar. Once the update is complete, the power
light will go back to solid green.
Next, confirm the firmware on your MimioTeach device by opening MimioStudio
software and going to Tools Settings Classroom Devices. Click on
“MimioTeach” and you should see some information on the screen such as
1.6.2D and 1.8.4D. Please confirm this. Then try the MimioTeach device again
and see if it works.
3. If the Problem Is Still Not Resolved:
If you are still seeing the same issue, use a push-pin to remove the plastic covers
over the two microphones on your MimioTeach bar completely, making sure the
microphones themselves are not touched. Insert the push-pin in into each
microphone cover and pull up, but don’t let the push-pin touch the microphone.
Then try the MimioTeach device again.
4. If the Problem Is Still Not Resolved:
Please contact customercare@boxlight.com to inquire about a replacement
stylus (charges may apply).
Microphone

12
Updated March 2017
Mounting MimioTeach to a Whiteboard
Problem: The MimioTeach bar won’t stay mounted to the whiteboard.
Symptoms: The bar keeps sliding off the whiteboard.
Recommended Action:
We recommend using the supplied mounting brackets for a permanent fix. If this
is not an option, then clean the surface where the device is to be placed with
isopropyl rubbing alcohol or Expo wipes. Wipe gently and let dry. Do not use
household cleaners. Access this YouTube video to learn how to put the brackets
on and mount the MimioTeach to your whiteboard:
https://www.youtube.com/watch?v=D4mBaF62ABc
Pairing MimioTeach
Problem: The MimioTeach device is not paired with the computer.
Symptoms: The amber light is lit on the MimioTeach bar.
Recommended Action:
1. Make sure you have the latest version of MimioStudio software. You can
download the latest version of MimioStudio software from the following
link: www.mimio.com/software. Once you have updated the software, plug
the MimioTeach bar into the computer with the USB cable so that the
software update is also applied to the bar. While the update is loading, you
will see a blinking green power light on the bar. Once the update is
complete, the power light will go back to solid green.
2. Next, verify that the wireless USB receiver is connected to your PC’s USB
port. Open MimioStudio Notebook Tools Settings Classroom
Devices. The MimioHub™ wireless receiver should show as “Connected”
under Status.
3. Press and hold the power LED button on the MimioTeach bar until it
begins to blink (approximately 20 seconds).

13
Updated March 2017
MimioTeach Power LED Button

14
Updated March 2017
4. Open MimioStudio Notebook and select Tools Settings Classroom
Devices. The MimioTeach device should show as “Available” under the
Status column.
5. Select “MimioTeach” from the list and then select the Connect button. The
MimioTeach status should change to “Connected.”

15
Updated March 2017
Chapter 2. MimioProjector 240, 240i
MimioProjector Installation
Problem: How do I install the MimioProjector™ interactive projector?
Recommended Action:
For information about installing the mount for the MimioProjector interactive
projector, view the following PDF on our website:
https://mimio.boxlight.com/wp-
content/uploads/2016/09/MimioProjector_MountingGuide.pdf
Replacing the Bulb in the MimioProjector
Problem: How to change the bulb in the MimioProjector device?
Recommended Action:
For information about changing the MimioProjector bulb, see page 39 in the user
guide on our website:
http://www.mimio.com/~/media/Files/Downloads/Support/Documentation/MimioPr
ojector/UserGuides/MimioProjector_UG_en.ashx
Replacing the Filter in the MimioProjector

16
Updated March 2017
Problem: How to change the filter in the MimioProjector device?
Recommended Action:
For information about changing the MimioProjector filter, view the PDF on our
website:
https://mimio.boxlight.com/wp-content/uploads/2017/03/MimioProjector-Cleaning-
Dust-Filers.pdf
Setting Up the MimioProjector
Problem: How to set up the MimioProjector interactive projector?
Recommended Action:
For information about the MimioProjector setup, view the PDF on our website:
http://www.mimio.com/~/media/Files/Downloads/Support/Documentation/MimioPr
ojector/UserGuides/MimioProjector_UG_en.ashx
Making a Non-Interactive MimioProjector Interactive
Problem: How do I make a non-interactive MimioProjector device an interactive
unit?
Recommended Action:
You need to purchase the separate IR Module and install it per the picture below:

17
Updated March 2017
If you receive this message, see the list below for potential issues:
• In the projector menu under Interactive, you need to select the IR Camera
mode.
• If the option to select IR camera is grayed out, check to see that the IR
module is installed correctly. Make sure the pins are lined up and inserted
into the connector properly.
• If this is selected, check to see whether you have a USB cable connecting
the projector to your PC.
Projection Issues
Problem: Projector won’t show an image.
18
Updated March 2017
Symptoms: When AV cords are connected to the computer from the projector,
the unit is not projecting any image. Only the Boxlight Mimio splash screen
appears when the cords are connected.
Recommended Action(s):
1. Try This First:
Confirm that the AV cord is connected to the projector and the computer—
an HDMI or VGA cord will be needed for connection. If you see the Mimio
splash screen when you power on the MimioProjector device, make sure
that either an HDMI cable or a VGA cable is connected to the unit from the
computer and that you have the correct corresponding source selected
using the MimioProjector remote.
2. If the Problem Is Still Not Resolved:
Swap the current cord for a different, known working one to see if it’s just
a defective cord. Also, you’ll want to confirm that the cord isn’t being
extended, and connecting directly from the projector to the computer using
a standard 15 ft. HDMI/VGA cord. If the direct connection works, the issue
is with the extenders and they’ll need to be swapped out or bypassed.
3. If the Problem Is Still Not Resolved:
Try connecting the AV cords to a different, known working computer (one
that currently works with another MimioProjector 240) to see if a different
computer allows for the image to be seen. If another computer works, then
the issue would be with the original computer being connected. Most
likely, it’s a graphics card issue and can often be resolved by updating the
video/graphics card.
4. If the Problem Is Still Not Resolved:
If the issue persists after checking everything mentioned above, then the
issue will most likely be internal with the projector and the unit will need to
be sent in for repairs. Confirm the projector is still within the 2-year
warranty, and if so, proceed with the RMA to your assigned repair center.
Problem: The projector shows no image when powered on, or the image is
very faint.
Symptoms: Power light is on, but no image is seen, or it is very faint and hard to
see. The power light is on and the lamp light is on.
Recommended Action(s):
1. Try This First:
Confirm that the brightness hasn’t been turned down in the projector
menu.
2. If the Problem Is Still Not Resolved:
Borrow a lamp from a known working projector and swap it out with the
one in the current projector. If the borrowed lamp works and allows for the
image to be projected as expected, then the customer will need a new
lamp. As long as the lamp is in warranty (90 days from purchase), you can
19
Updated March 2017
replace it for the customer. If it is out of warranty, you can provide them
with pricing for a new one.
3. If the Problem Is Still Not Resolved:
It’s possible there’s an internal issue with the lamp ballast and the
projector will need to be repaired. Please take the steps to submit a
projector warranty claim if the projector is within the warranty timeframe. If
the projector is out of warranty, the customer will have to pay for the
repairs.
Problem: The projector overheats and powers down.
Symptoms: Error message about overheating appears, the temp light is on or
flashing, or projector powers down and temp light comes on.
Recommend Action(s):
1. Try This First:
Confirm that the filters have been recently cleaned—we recommend at
least every other month. If they are not clean, please clean them out using
a shop vac (or something of the like).
2. If the Problem Is Still Not Resolved:
Go through a full power cycle, making sure to disconnect and unplug the
projector for at least an hour.
3. If the Problem Is Still Not Resolved:
Most likely, there’s an internal issue with the projector and it will need to
be repaired. Confirm the warranty with the customer, and if it’s in warranty,
proceed with the projector RMA process. If it’s out of warranty, the
customer will need to pay for the repairs.
Interactivity Issues
Problem: The projector is connected and displaying an image, but it will
not interact.
Symptoms: Computer displays error message that “USB not recognized,”
calibration won’t come up, projector doesn’t show under Classroom Devices as
“Connected,” and/or calibration screen appears, but the pen’s input is not seen.
Recommended Action(s):
1. Try This First:
Confirm that the IR module is clicked into place securely on the projector,
with all the pins touching. Once this has been checked, you’ll want to
confirm that the IR module is turned on within the projector’s menu under
the Interactive option. If it reads as off, use the buttons on the remote to
turn it on. If it stays grayed out, please try swapping for a different, known
working IR module. If another IR module allows for the Interactive to be
20
Updated March 2017
turned on, then you’ll want to replace the IR module for the customer, as
long as the projector is still within the 2-year warranty.
2. If the Problem Is Still Not Resolved:
Check the connections for the USB cord. Is it going directly from the
projector to the computer? If not, and there are extenders in place, please
try bypassing the extenders and connecting directly to see if that allows for
the USB cord to be recognized for the projector to connect. If bypassing
the extender allows for the connection to be seen and the interactive to
work, most likely there’s an issue with the extenders. We recommend CAT
5E or CAT 6 extenders—daisy chaining multiple USB cords together will
cause the connection to fail. If the cords go into a wall adapter, confirm
that all cords are snug in place and are the recommended ones by Boxlight
Mimio.
Problem: There’s no interaction after calibration or touch point is off after
successful calibration.
Symptoms: Projector shows as “Connected” under Classroom Devices and
allows for the auto calibration to happen, but there’s no interaction after auto
calibrating, or the calibration is still off.
Recommended Action(s):
1. Try This First:
Confirm that the projected image is within the borders of the whiteboard,
and that it’s not extended beyond the borders.
2. If the Problem Is Still Not Resolved:
Confirm that there’s nothing on or around the board that could be causing
interference. This includes—but is not limited to—magnets, papers,
LED/Christmas-style lights, motion/security sensors, other IR devices,
direct sunlight, direct overhead lights, marker trays, etc. Remove any of
these items and try interacting again. If there’s a marker tray on the
whiteboard, you will need to make sure the projected image is at least 3
inches above the top of the tray to avoid interference. If there’s sunlight
hitting the board or overhead lights, pull the shades down, turn the lights
off, and calibrate in the dark. See if this allows for you to interact after
calibration.
3. If the Problem Is Still Not Resolved:
Try adjusting the screen/display resolution of the computer connected to
the projector. The native resolution for the projector is 1280 x 800. Please
start here, then move up or down from there accordingly per your results.
4. If the Problem Is Still Not Resolved:
Try changing the batteries in the pen. Also, you can try using a different,
known working pen from another projector to see if that helps. If another,
known working pen resolves the issue, confirm the warranty with the
customer and if it’s in warranty, replace the pen for them. If it’s out of
warranty, they can purchase a new one from you.

21
Updated March 2017
5. If the Problem Is Still Not Resolved:
Swap out the IR module for a known working one to see if a different IR
module allows for the interaction to work as expected. If another, known
working IR module resolves the issue, confirm the warranty with the
customer and if it’s in warranty, replace the IR module for them. If it’s out
of warranty, they can purchase a new one from you.

22
Updated March 2017
Chapter 3. MimioProjector 280, 280i, 280T
Projection Issues
Problem: Projector won’t show an image.
Symptoms: When AV cords are connected to the computer from the projector,
the unit is not projecting any image. Only the Boxlight Mimio splash screen
appears when the cords are connected.
Recommended Action(s):
1. Try This First:
Confirm that the AV cord is connected to the projector and the computer—
an HDMI or VGA cord will be needed for connection. If you see the Mimio
splash screen when you power on the unit, make sure that either an HDMI
cable or a VGA cable is connected to the MimioProjector device from the
computer and that you have the correct corresponding source selected
using the MimioProjector remote.
2. If the Problem Is Still Not Resolved:
Swap the current cord for a different, known working one to see if it’s just
a defective cord. Also, you’ll want to confirm that the cord isn’t being
extended, and connecting directly from the projector to the computer using
a standard 15 ft. HDMI/VGA cord. If the direct connection works, the issue
is with the extenders and they’ll need to be swapped out or bypassed.
3. If the Problem Is Still Not Resolved:
Try connecting the AV cords to a different, known working computer (one
that currently works with another MimioProjector 280) to see if a different
computer allows for the image to be seen. If another computer works, then
the issue would be with the original computer being connected. Most
likely, it’s a graphics card issue and can often be resolved by updating the
video/graphics card.
4. If the Problem Is Still Not Resolved:
If the issue persists after checking everything mentioned above, then the
issue will most likely be internal with the projector and the unit will need to
23
Updated March 2017
be sent in for repairs. Confirm the projector is still within the 2-year
warranty, and if so, proceed with the RMA to your assigned repair center.
Problem: The projector shows no image when powered on, or the image is
very faint.
Symptoms: Power light is on but no image is seen, or it is very faint and hard to
see. The power light is on and the lamp light is on.
Recommended Action(s):
1. Try This First:
Confirm that the brightness hasn’t been turned down in the projector
menu.
2. If the Problem Is Still Not Resolved:
Borrow a lamp from a known working projector and swap it out with the
one in the current projector. If the borrowed lamp works and allows for the
image to be projected as expected, then the customer will need a new
lamp. As long as the lamp is in warranty (90 days from purchase), you can
replace it for the customer. If it is out of warranty, you can provide them
with pricing for a new one.
3. If the Problem Is Still Not Resolved:
It’s possible there’s an internal issue with the lamp ballast and the
projector will need to be repaired. Please take the steps to submit a
projector warranty claim if the projector is within the warranty timeframe. If
the projector is out of warranty, the customer will have to pay for the
repairs.
Problem: The projector overheats and powers down.
Symptoms: Error message about overheating appears, the temp light is on or
flashing, or projector powers down and temp light comes on.
Recommend Action(s):
1. Try This First:
Confirm that the filters have been recently cleaned—we recommend at
least every other month. If they are not clean, please clean them out using
a shop vac (or something of the like).
2. If the Problem Is Still Not Resolved:
Go through a full power cycle, making sure to disconnect and unplug the
projector for at least an hour.
3. If the Problem Is Still Not Resolved:
Most likely, there’s an internal issue with the projector and it will need to
be repaired. Confirm the warranty with the customer, and if it’s in warranty,
proceed with the projector RMA process. If it’s out of warranty, the
customer will need to pay for the repairs.
24
Updated March 2017
Interactivity Issues
Problem: The projector is connected and displaying an image, but it will
not interact.
Symptoms: Computer displays error message that “USB not recognized,”
calibration won’t come up, projector doesn’t show under Classroom Devices as
“Connected,” and/or calibration screen appears, but the pen’s input is not seen.
Recommended Action(s):
1. Try This First:
Confirm that you have at least MimioStudio 11.4 (Mac) or 11.41
(Windows)—the first version of MimioStudio that allows for compatibility
with the 280 projectors.
2. If the Problem Is Still Not Resolved:
Confirm that the IR module is clicked into place securely on the projector,
with all the pins touching. Once this has been checked, you’ll want to
confirm that the IR module is turned on within the projector’s menu under
the Interactive option. If it reads as off, use the buttons on the remote to
turn it on. If it stays grayed out, please try swapping for a different, known
working IR module. If another IR module allows for the Interactive to be
turned on, then you’ll want to replace the IR module for the customer, as
long as the projector is still within the 2-year warranty.
3. If the Problem Is Still Not Resolved:
Check the connections for the USB cord. Is it going direct from the
projector to the computer? If not, and there are extenders in place, please
try bypassing the extenders and connecting directly to see if that allows for
the USB cord to be recognized for the projector to connect. If bypassing
the extender allows for the connection to be seen and the interactive to
work, most likely there’s an issue with the extenders. We recommend CAT
5E or CAT 6 extenders—daisy chaining multiple USB cords together will
cause the connection to fail. If the cords go into a wall adapter, confirm that
all cords are snug in place and are the recommended ones by Boxlight
Mimio.
Problem: There’s no interaction after auto calibration or touch point is off
after successful auto calibration.
Symptoms: Projector shows as “Connected” under Classroom Devices and
allows for the calibration to happen, but there’s no interaction after auto
calibrating, or the calibration is still off.
25
Updated March 2017
Recommended Action(s):
1. Try This First:
Confirm that the projected image is within the borders of the whiteboard,
and that it’s not extended beyond the borders.
2. If the Problem Is Still Not Resolved:
Confirm that there’s nothing on or around the board that could be causing
interference. This includes—but is not limited to—magnets, papers,
LED/Christmas-style lights, motion/security sensors, other IR devices,
direct sunlight, direct overhead lights, marker trays, imperfections in the
board (dents, curves, bumps, indents, etc.), etc. Remove any of these
items and try interacting again. If there’s a marker tray on the whiteboard,
you will need to make sure the projected image is at least 3 inches above
the top of the tray to avoid interference. If there’s sunlight hitting the board
or overhead lights, pull the shades down and turn the lights off and
calibrate in the dark—see if this allows for you to interact after calibration.
If the board is not “laser flat” this will most likely be an issue, and you’ll
need to adjust the board accordingly, or use a different board.
3. If the Problem Is Still Not Resolved:
Try adjusting the screen/display resolution of the computer connected to
the projector. The native resolution for the projector is 1280 x 800. Please
start here and move up or down from there accordingly per your results.
4. If the Problem Is Still Not Resolved:
Try changing the batteries in the pen. Also, you can try using a different,
known working pen from another projector to see if that helps. If another,
known working pen resolves the issue, confirm the warranty with the
customer and if it’s in warranty, replace the pen for them. If it’s out of
warranty, they can purchase a new one from you.
5. If the Problem Is Still Not Resolved:
Swap out the IR module for a known working one to see if a different IR
module allows for the interaction to work as expected. If another, known
working IR module resolves the issue, confirm the warranty with the
customer and if it’s in warranty, replace the IR module for them. If it’s out
of warranty, they can purchase a new one from you.
Problem: Things are being clicked on without being at the board.
Symptoms: Touch points activated without being up at the board. The cursor
goes to top left corner and doesn’t move from there.
Recommended Action(s):
1. Try This First:
Confirm that there’s nothing on or around the whiteboard that could be
causing interference. This includes—but is not limited to—magnets,
papers, LED/Christmas-style lights, motion/security sensors, other IR
devices, direct sunlight, direct overhead lights, marker trays, imperfections
in the board (dents, curves, bumps, indents, etc.), etc. Remove any of
26
Updated March 2017
these items and try interacting again. If there’s a marker tray on the
whiteboard, you will need to make sure the projected image is at least 3
inches above the top of the tray to avoid interference. If there’s sunlight
hitting the board or overhead lights, pull the shades down and turn the
lights off and calibrate in the dark—see if this allows for you to interact
after calibration. If the board is not “laser flat” this will most likely be an
issue, and you’ll need to adjust the board accordingly, or use a different
board.
2. If the Problem Is Still Not Resolved:
Adjust the laser curtain, confirm that the points are up tight against the
board and lined up with the bottom of the projected image.
3. If the Problem Is Still Not Resolved:
Try swapping the IR module with a different, known working one to see if
it’s just the IR module that’s the issue. If another IR module allows for the
projector to act as expected, you will want to confirm the purchase date
with the customer to determine if it’s still in warranty or not. If it’s in
warranty, you can replace it for the customer. If it’s out of warranty, you’ll
want to provide the customer with pricing for a new one.
4. If the Problem Is Still Not Resolved:
Try swapping the laser curtain for a different, known working one to see if
it’s the laser curtain that’s not working as expected. If another laser curtain
allows for the projector to act as expected, you will want to confirm the
purchase date with the customer to determine if it’s still in warranty or not.
If it’s in warranty, you can replace it for the customer. If it’s out of warranty,
you’ll want to provide the customer with pricing for a new one.

27
Updated March 2017
Chapter 4. Dallas WX35nxt
The Dallas WX35nxt is an ultra-short throw projector with no interactive
functions.
(Shown with optional IR camera and interactive pens)
Lighting Issues
Problem: The unit will not light.
Symptoms: Fans will turn on after pressing the power button, but there is no
light and the unit shuts down.
Recommended Action(s):
1. Try This First:
Check the lamp of the projector to see if there are any physical problems with
it. If it looks fine, reinsert and try again. If the lamp still will not light, try a
known working lamp—either a spare or one from another projector.
2. If the Problem Is Still Not Resolved:
If the problem persists, the unit will need to be serviced.
Projection Issues
Problem: Projector won’t show an image.
Symptoms: When AV cords are connected to the computer from the projector,
the unit is not projecting any image. Only the Boxlight splash screen appears
when the cords are connected.
Recommended Action(s):
1. Try This First:

28
Updated March 2017
Confirm that the AV cord is connected to the projector and the computer—
an HDMI or VGA cord will be needed for connection. If you see the
Boxlight splash screen when you power on the projector, make sure that
either an HDMI cable or a VGA cable is connected to the unit from the
computer and that you have the correct corresponding source selected
using the projector remote.
2. If the Problem Is Still Not Resolved:
Swap the current cord for a different, known working one to see if it’s just
a defective cord. Also, you’ll want to confirm that the cord isn’t being
extended, and connecting directly from the projector to the computer using
a standard 15 ft. HDMI/VGA cord. If the direct connection works, the issue
is with the extenders and they’ll need to be swapped out or bypassed.
3. If the Problem Is Still Not Resolved:
Try connecting the AV cords to a different, known working computer (one
that currently works with another projector) to see if a different computer
allows for the image to be seen. If another computer works, then the issue
would be with the original computer being connected. Most likely, it’s a
graphics card issue and can often be resolved by updating the
video/graphics card.
4. If the Problem Is Still Not Resolved:
If the issue persists after checking everything mentioned above, then the
issue will most likely be internal with the projector and the unit will need to
be sent in for repairs. Confirm the projector is still within the warranty, and
if so, proceed with the RMA to your assigned repair center.

29
Updated March 2017
Chapter 5. P8 WX31nxt
The P8 WX31nxt is interactive with the use or one or two LightPen interactive
tools.
Lighting Issues
Problem: Unit will not light.
Symptoms: Fans turn on after pressing the power button, but there is no light
and the unit shuts down.
Recommended Action(s):
1. Try This First:
Check the lamp of the projector to see if there are any physical problems with
it. If it looks fine, reinsert and try again. If the lamp still will not light, try a
known working lamp—either a spare or one from another projector.
2. If the Problem Is Still Not Resolved:
If the problem persists, the unit will need to be serviced.
Projection Issues
Problem: Projector won’t show an image.
Symptoms: When AV cords are connected to the computer from the projector,
the unit is not projecting any image. Only the Boxlight splash screen appears
when the cords are connected.
Recommended Action(s):
1. Try This First:
30
Updated March 2017
Confirm that the AV cord is connected to the projector and the computer—
an HDMI or VGA cord will be needed for connection. If you see the
Boxlight splash screen when you power on the projector, make sure that
either an HDMI cable or a VGA cable is connected to the unit from the
computer and that you have the correct corresponding source selected
using the projector remote.
2. If the Problem Is Still Not Resolved:
Swap the current cord for a different, known working one to see if it’s just
a defective cord. Also, you’ll want to confirm that the cord isn’t being
extended, and connecting directly from the projector to the computer using
a standard 15 ft. HDMI/VGA cord. If the direct connection works, the issue
is with the extenders and they’ll need to be swapped out or bypassed.
3. If the Problem Is Still Not Resolved:
Try connecting the AV cords to a different, known working computer (one
that currently works with another projector) to see if a different computer
allows for the image to be seen. If another computer works, then the issue
would be with the original computer being connected. Most likely, it’s a
graphics card issue and can often be resolved by updating the
video/graphics card.
4. If the Problem Is Still Not Resolved:
If the issue persists after checking everything mentioned above, then the
issue will most likely be internal with the projector and the unit will need to
be sent in for repairs. Confirm the projector is still within the warranty, and
if so, proceed with the RMA to your assigned repair center.
Interactivity Issues
Problem: The projector is connected and displaying an image, but it will
not interact.
Symptoms: No (or erratic) interaction on the screen when using the LightPens.
Recommended Action(s):
1. Try This First:
Confirm the camera module is properly seated on the projector and all
pins are touching (none bent). Also, make sure the IR camera is turned on
under the Interactive menu option in the projector’s menu. Ensure you
have the most recent copy of the P8 SP driver loaded on the computer.
You can see the icon for the driver, which looks like a chain link or infinity
symbol, on the toolbar (at the bottom on a PC and at the top on a Mac).
a. If the link is red, then we do not have a working USB connection
between the computer and the projector. Please check or swap all
USB cables, extenders, etc. and try again.
b. If the link is green, the system is communicating properly
between the computer and the projector.
2. If the Problem Is Still Not Resolved:

31
Updated March 2017
Click the P8 SP driver icon and select Calibration. Touch the targets on
the screen with the tip of the LightPen. Follow the targets—there will be
four of them in total. Once done, you should be good to go.
3. If the Problem Is Still Not Resolved:
Should you have issues with the mouse moving on the screen without you
interacting, you likely have a light source that the camera of the projector
is picking up. The best way to resolve this is to turn off all lights, shade
any windows near the screen, and try again. You may find the offending
light source by trial and error.
Problem: The message “The LightPen program is not found” appears.
Recommended Action(s):
1. Try This First:
Check the USB cable between the computer and the unit and ensure that
they are seated correctly. Check the icon on the tool bar: “A” indicates no
connection between the computer and the projector, while “B” indicates a
good connection between the computer and the projector.
“A” “B”
Problem: Can’t calibrate—the target appears on the screen, but won’t
respond.
Recommended Action(s):
1. Try This First:
Check that the pen is on by pushing the switch at the end of the pen. If on,
the tip should glow red or orange when touched. Try new batteries if the
tip is not glowing.
2. If the Problem Is Still Not Resolved:
When using the pointer or LightPen, avoid writing in the shadow area (see
figure below) and maintain a 25-degree angle against
the projection screen. The pointer or LightPen is
available for use only when the signal transmitted can
be received by the sensors in the projector.
CMOS Sensor
3. If the Problem Is Still Not Resolved:
The ambient lighting may be too bright to work properly. Please keep the
projection screen and sensors from direct ambient lights, such as:

32
Updated March 2017
A. Direct sunlight to the projection screen.
B. Light sources existing near the sensors.
Turn off all light sources in the room and close the window blinds to try to
reduce as much light as possible. This may require a bit of trial and error
to locate the source of the external light.
Problem: Cursor is not in the same place on the screen as I am touching
(calibration is off).
Recommended Action(s):
1. Try This First:
Try to recalibrate and ensure that you are touching the center of the
calibration target.
2. If the Problem Is Still Not Resolved:
Check the computer resolution. Take the computer to 1280 x 800 (or a
resolution close to that) and recalibrate. Then, you can experiment to get
the highest possible resolution and still be calibrated properly.
3. If the Problem Is Still Not Resolved:
Check the mounting position and installation to ensure that nothing has
changed.
Problem: Cursor jumps around or is erratic.
Recommended Action(s):
1 Try This First:
The ambient lighting may be too bright to work properly. Please keep the
projection screen and sensors from ambient light interference, especially
direct sunlight. See solution above.

33
Updated March 2017
Chapter 6. P10 WX35nxt
The P10 WX35nxt is touch interactive and has a laser curtain module to provide
the figure touch functions.
Lighting Issues
Problem: Unit will not light.
Symptoms: Fans turn on after pressing the power button, but there is no light
and the unit shuts down.
1. Try This First:
Check the lamp of the projector to see if there are any physical problems
with it. If it looks fine, reinsert and try again. If the lamp still will not light, try
a known working lamp—either a spare or one from another projector.
2. If the Problem Is Still Not Resolved:
If the problem persists, the unit will need to be serviced.
Projection Issues
Problem: Projector won’t show an image.
Symptoms: When AV cords are connected to the computer from the projector,
the unit is not projecting any image. Only the Boxlight splash screen appears
when the cords are connected.
Recommended Action(s):
1. Try This First:
Confirm that the AV cord is connected to the projector and the computer—
an HDMI or VGA cord will be needed for connection. If you see the
Boxlight splash screen when you power on the projector, make sure that
either an HDMI cable or a VGA cable is connected to the projector from
34
Updated March 2017
the computer and that you have the correct corresponding source selected
using the projector remote.
2. If the Problem Is Still Not Resolved:
Swap the current cord for a different, known working one to see if it’s just
a defective cord. Also, you’ll want to confirm that the cord isn’t being
extended, and connecting directly from the projector to the computer using
a standard 15 ft. HDMI/VGA cord. If the direct connection works, the issue
is with the extenders and they’ll need to be swapped out or bypassed.
3. If the Problem Is Still Not Resolved:
Try connecting the AV cords to a different, known working computer (one
that currently works with another projector) to see if a different computer
allows for the image to be seen. If another computer works, then the issue
would be with the original computer being connected. Most likely, it’s a
graphics card issue and can often be resolved by updating the
video/graphics card.
4. If the Problem Is Still Not Resolved:
If the issue persists after checking everything mentioned above, then the
issue will most likely be internal with the projector and the unit will need to
be sent in for repairs. Confirm the projector is still within the warranty, and
if so, proceed with the RMA to your assigned repair center.
Interactivity Issues
Problem: Unit will project, but has no or intermittent interactivity.
Symptoms: No (or erratic) interaction on the screen with the LightPens.
1. Try This First:
Confirm the camera module is properly seated on the projector and all
pins are touching (none bent). Also, make sure the IR camera is turned on
under the Interactive menu option in the projector’s menu. Ensure you
have the most recent copy of the TouchDriver loaded on the computer.
You can see the icon for the driver, which looks like a chain link or infinity
symbol, on the toolbar (at the bottom on a PC and at the top on a Mac).
a. If the link is red, then we do not have a working USB connection
between the computer and the projector. Please check or swap all
USB cables, extenders, etc. and try again.
b. If the link is green, the system is communicating properly between
the computer and the projector.
Ensure the power cable is connected between the laser module and the
projector. Verify the light on the front of the laser module. Below is a list of
the lights and indicators:

35
Updated March 2017
2. If the Problem Is Still Not Resolved:
Ensure the calibration of the laser module is preformed correctly and that
there are no light sources near the screen that may interfere with the
camera function (try turning off all light sources near the screen). For the
laser module calibration, see the user guide for a detailed explanation.
Problem: The TouchDriver icon ( ) is red, not green ( ).
1. Try This First:
a. Check if interactive function is enabled via OSD selection
b. Unplug/re‐ plug in the USB cable and check again.
c. Switch to another USB port and check again.
d. Use the USB cable included with your projector and check again. If
a USB extension is needed, please contact your distributor.
e. Restart your computer and check again.

36
Updated March 2017
2. If the Problem Is Still Not Resolved:
The USB port of your computer maybe not working. Please contact your
IT staff.
Problem: Cursor jumps/flashes on the screen or the touch function does
not respond well in certain areas of the screen.
1. Try This First:
a. Check if there is a strong light shown on the whiteboard. If yes,
turn off the light.
b. Check if there are any foreign objects on the whiteboard. If yes,
remove the object(s).
c. Press Ctrl+P to initiate “Installation mode” and perform Step 4
Manual Mask Setting to check if mask boundary is delineated
properly.
d. Press Ctrl+P to initiate “Installation mode” and perform Laser
Beam Adjustment to check if laser beam is hitting the whiteboard.
Please refer to Step 5 Laser Beam Adjustment for detailed
procedures.
Problem: Touch function is not accurate.
1. Try This First:
Check the display setting and make sure the zoom function is set to 100%
(default). Setting to anything different will affect the touch calibration.
2. If the Problem Is Still Not Resolved:
Check the screen resolution and change to 1280x800 and recalibrate. If the
calibration is now working, you can experiment and recalibrate to find a higher
resolution.
37
Updated March 2017
Chapter 7. P12 Projector (non-interactive
model)
Typical projector representative
Lighting Issues
Problem: Unit will not light.
Symptoms: Fans turn on after pressing the power button, but there is no light
and the unit shuts down.
Recommended Action(s):
1. Try This First:
Check the lamp of the projector to see if there are any physical problems
with it. If it looks fine, reinsert and try again. If the lamp still will not light, try
a known working lamp—either a spare or one from another projector.
2. If the Problem Is Still Not Resolved:
If the problem persists, the unit will need to be serviced.
Projection Issues
Problem: Projector won’t show an image.
Symptoms: When AV cords are connected to the computer from the projector,
the unit is not projecting any image. Only the Boxlight splash screen appears
when the cords are connected.
Recommended Action(s):
1. Try This First:
Confirm that the AV cord is connected to the projector and the computer—
an HDMI or VGA cord will be needed for connection. If you see the
Boxlight splash screen when you power on the projector, make sure that

38
Updated March 2017
either an HDMI cable or a VGA cable is connected to the unit from the
computer and that you have the correct corresponding source selected
using the projector remote.
2. If the Problem Is Still Not Resolved:
Swap the current cord for a different, known working one to see if it’s just
a defective cord. Also, you’ll want to confirm that the cord isn’t being
extended, and connecting directly from the projector to the computer using
a standard 15 ft. HDMI/VGA cord. If the direct connection works, the issue
is with the extenders and they’ll need to be swapped out or bypassed.
3. If the Problem Is Still Not Resolved:
Try connecting the AV cords to a different, known working computer (one
that currently works with another projector) to see if a different computer
allows for the image to be seen. If another computer works, then the issue
would be with the original computer being connected. Most likely, it’s a
graphics card issue and can often be resolved by updating the
video/graphics card.
4. If the Problem Is Still Not Resolved:
If the issue persists after checking everything mentioned above, then the
issue will most likely be internal with the projector and the unit will need to
be sent in for repairs. Confirm the projector is still within the warranty, and
if so, proceed with the RMA to your assigned repair center.
Problem: Unit will not focus.
Symptoms: Image is fuzzy or not clear.
Recommended Action(s):
1. Try This First:
The focus can be adjusted using the sliding lever on the side of the
projector.
Problem: Image is not squared to the screen (top of image is wider or
narrower than bottom).

39
Updated March 2017
Recommended Action(s):
1. Try This First:
Adjust the keystone from the remote or the projector menu to equalize the
top and bottom image size.
2. If the Problem Is Still Not Resolved:
You may have to reposition the projector to enable the keystoning to be
reduced. Usually this would involve raising or lowering the projector in
relation to the screen.

40
Updated March 2017
Chapter 8. P12 Projector (pen interactive
model)
Typical projector representative
Lighting Issues
Problem: Unit will not light.
Symptoms: Fans turn on after pressing the power button, but there is no light
and the unit shuts down.
Recommended Action(s):
1. Try This First:
Check the lamp of the projector to see if there are any physical problems
with it. If it looks fine, reinsert and try again. If the lamp still will not light, try
a known working lamp—either a spare or one from another projector.
2. If the Problem Is Still Not Resolved:
If the problem persists, the unit will need to be serviced.
Projection Issues
Problem: Projector won’t show an image.
Symptoms: When AV cords are connected to the computer from the projector,
the unit is not projecting any image. Only the Boxlight splash screen appears
when the cords are connected.
Recommended Action(s):
1. Try This First:
Confirm that the AV cord is connected to the projector and the computer—
an HDMI or VGA cord will be needed for connection. If you see the
Boxlight splash screen when you power on the projector, make sure that
either an HDMI cable or a VGA cable is connected to the unit from the

41
Updated March 2017
computer and that you have the correct corresponding source selected
using the projector remote.
2. If the Problem Is Still Not Resolved:
Swap the current cord for a different, known working one to see if it’s just
a defective cord. Also, you’ll want to confirm that the cord isn’t being
extended, and connecting directly from the projector to the computer using
a standard 15 ft. HDMI/VGA cord. If the direct connection works, the issue
is with the extenders and they’ll need to be swapped out or bypassed.
3. If the Problem Is Still Not Resolved:
Try connecting the AV cords to a different, known working computer (one
that currently works with another projector) to see if a different computer
allows for the image to be seen. If another computer works, then the issue
would be with the original computer being connected. Most likely, it’s a
graphics card issue and can often be resolved by updating the
video/graphics card.
4. If the Problem Is Still Not Resolved:
If the issue persists after checking everything mentioned above, then the
issue will most likely be internal with the projector and the unit will need to
be sent in for repairs. Confirm the projector is still within the warranty, and
if so, proceed with the RMA to your assigned repair center.
Problem: Unit will not focus.
Symptoms: Image is fuzzy or not clear.
Recommended Action(s):
1. Try This First:
The focus can be adjusted using the sliding lever on the side of the
projector.
Problem: Image is not squared to the screen (top of image is wider or
narrower than bottom).
Recommended Action(s):
1. Try This First:
Adjust the keystone from the remote or the projector menu to equalize the
top and bottom image size.

42
Updated March 2017
2. If the Problem Is Still Not Resolved:
You may have to reposition the projector to enable the keystoning that
needs to be reduced. Usually this would involve raising or lowering the
projector in relation to the screen.
Interactivity Issues
Problem: Unit will display, but there are no interactive functions.
Recommended Action(s):
1. Try This First:
Make sure the IR camera is turned on under the Interactive menu option in
the projector’s menu. Ensure you have the most recent copy of the Optical
Driver loaded on the computer. You can see the icon for the driver on the
toolbar (at the bottom on a PC and at the top on a Mac). Below are the
three options:
Touch Mode. Pen Mode. Disconnected.
2. If the Problem Is Still Not Resolved:
If the icon is red, then check or replace the USB cable between the
projector and the computer. This would include all extenders, connectors,
extension cables, etc.
3. If the Problem Is Still Not Resolved:
Remove the Optical Touch program and reinstall.
4. If the Problem Is Still Not Resolved:
Try to substitute another projector into the same cabling. If this proves to
work, the issue is with the projector and the unit will need to be serviced.
Problem: Calibration is off or not accurate.
Recommended Action(s):
1. Try This First:
Click the Optical Touch icon and recalibrate. If a new computer is being
used with the projector or the projector has been moved in relation to the
screen, the unit will need to be recalibrated.
2. If the Problem Is Still Not Resolved:
Try to change the computer resolution to 1280x800 (or one close to this).
Recalibrate. If this resolves the issue, you can experiment with different
resolution settings to get the best image and the proper calibration.
3. If the Problem Is Still Not Resolved:
On a Windows computer, open Control Panel > Appearance and
Personalization, then select “Smaller – 100%(Default)” and click “Apply”.
This zoom feature in Windows will cause problems with the calibration.

43
Updated March 2017
Problem: Unable to calibrate. The targets appear on the screen, but won’t
respond.
Recommended Action(s):
1. Try This First:
Check that the pen is on by pushing the switch at the end of the pen. If it’s
on, the tip should glow red or orange when touched. If not, try using new
batteries.
2. If the Problem Is Still Not Resolved:
When using the pointer or LightPen, please avoid writing in shadow area
of you hand or arm—this will prevent the camera from seeing the IR tip of
the pen. Maintain a 25-degree angle against the projection screen. The
pointer or LightPen is available for use only when the signal transmitted by
the device can be received by the IR camera in the projector.
Problem: Cursor jumps around the screen or is erratic.
Recommended Action(s):
1. Try This First:
The ambient lighting may be too bright to work properly. Please keep
the projection screen and sensors from ambient light interference,
especially direct sunlight. Also, check for any other light sources near
the screen. If the IR camera of the projector can pick up the light
source, it may be a problem. The easiest way to check if lighting is the
source of the problem is to turn all lights in the room off and block off
all windows as best as possible to reduce the amount of light that may
be affecting the system.

44
Updated March 2017
Chapter 9. P12 Projector (laser/touch
interactive model)
Typical projector representative
Lighting Issues
Problem: Unit will not light.
Symptoms: Fans turn on after pressing the power button, but there is no light
and the unit shuts down.
Recommended Action(s):
1. Try This First:
Check the lamp of the projector to see if there are any physical problems
with it. If it looks fine, reinsert and try again. If the lamp still will not light, try
a known working lamp—either a spare or one from another projector.
2. If the Problem Is Still Not Resolved:
If the problem persists, the unit will need to be serviced.
Projection Issues
Problem: Projector won’t show an image
Symptoms: When AV cords are connected to the computer from the projector,
the unit is not projecting any image. Only the Boxlight splash screen appears
when the cords are connected.
Recommended Action(s):
1. Try This First:
Confirm that the AV cord is connected to the projector and the computer—
an HDMI or VGA cord will be needed for connection. If you see the
Boxlight splash screen when you power on the projector, make sure that
either an HDMI cable or a VGA cable is connected to the unit from the
computer and that you have the correct corresponding source selected
using the projector remote.

45
Updated March 2017
2. If the Problem Is Still Not Resolved:
Swap the current cord for a different, known working one to see if it’s just
a defective cord. Also, you’ll want to confirm that the cord isn’t being
extended, and connecting directly from the projector to the computer using
a standard 15 ft. HDMI/VGA cord. If the direct connection works, the issue
is with the extenders and they’ll need to be swapped out or bypassed.
3. If the Problem Is Still Not Resolved:
Try connecting the AV cords to a different, known working computer (one
that currently works with another projector) to see if a different computer
allows for the image to be seen. If another computer works, then the issue
would be with the original computer being connected. Most likely, it’s a
graphics card issue and can often be resolved by updating the
video/graphics card.
4. If the Problem Is Still Not Resolved:
If the issue persists after checking everything mentioned above, then the
issue will most likely be internal with the projector and the unit will need to
be sent in for repairs. Confirm the projector is still within the warranty, and
if so, proceed with the RMA to your assigned repair center.
Problem: Unit will not focus
Symptoms: Image is fuzzy or not clear.
Recommended Action(s):
1. Try This First:
The focus can be adjusted using the sliding lever on the side of the
projector.
Problem: Image is not squared to the screen (top of image is wider or
narrower than bottom).
Recommended Action(s):
1. Try This First:
Adjust the keystone from the remote or the projector menu to equalize the
top and bottom image size.

46
Updated March 2017
2. If the Problem Is Still Not Resolved:
You may have to reposition the projector to enable the keystoning that
needs to be reduced. Usually this would involve raising or lowering the
projector in relation to the screen.
Interactivity Issues
Problem: Unit will display, but there are no interactive functions.
Recommended Action(s):
1. Try This First:
Make sure the IR camera is turned on under the Interactive menu option in
the projector’s menu. Ensure you have the most recent copy of the Optical
Driver loaded on the computer. You can see the icon for the driver on the
toolbar (at the bottom on a PC and at the top on a Mac). Below are the
three options:
Touch Mode. Pen Mode. Disconnected.
2. If the Problem Is Still Not Resolved:
If the icon is red, then check or replace the USB cable between the
projector and the computer. This would include all extenders, connectors,
extension cables, etc.
3. If the Problem Is Still Not Resolved:
Remove the Optical Touch program and reinstall.
4. If the Problem Is Still Not Resolved:
Try to substitute another projector into the same cabling. If this proves to
work, the issue is with the projector and the unit will need to be serviced.
Problem: Calibration is off or not accurate.
Recommended Action(s):
1. Try This First:
Click the Optical Touch icon and recalibrate. If a new computer is being
used with the projector or the projector has been moved in relation to the
screen, the unit will need to be recalibrated.
2. If the Problem Is Still Not Resolved:
Try to change the computer resolution to 1280x800 (or one close to this).
Recalibrate. If this resolves the issue, you can experiment with different
resolution settings to get the best image and the proper calibration.
3. If the Problem Is Still Not Resolved:
On a Windows computer, open Control Panel > Appearance and
Personalization, then select “Smaller – 100%(Default)” and click “Apply”.
This zoom feature in Windows will cause problems with the calibration.
Problem: Cursor jumps around the screen or is erratic.

47
Updated March 2017
Recommended Action(s):
1. Try This First:
The ambient lighting may be too bright to work properly. Please keep the
projection screen and sensors from ambient light interference, especially
direct sunlight. Also, check for any other light sources near the screen. If
the IR camera of the projector can pick up the light source, it may be a
problem. The easiest way to check if lighting is the source of the problem
is to turn all lights in the room off and block off all windows as best as
possible to reduce the amount of light that may be affecting the system.
2. If the Problem Is Still Not Resolved:
Check the alignment of the laser module per the user guide. Be sure to
also check the flatness of the screen/board being used—the specs call for
a maximum board difference of >3mm.
3. If the Problem Is Still Not Resolved:
Check the board for a pen tray at the bottom of the screen—this may be
causing a IR reflection that the camera in the projector is seeing. You may
need to reduce the size of the image (by moving the projector closer to the
screen) and perform the Touch Area Setting to remove the pen tray from
being recognized. See Interactive User Guide for procedure.
Problem: Unit shows a green Optical Touch icon, but there is no interactivity.
Symptoms: There are no working touch functions, even though the auto calibration
works.
Recommended Action(s):
1. Try This First:
Check that the laser module is connected to the projector by the supplied
cable—this provides power to the module. Check the light on the front of
the laser model against the chart below:
Mode
Blue
LED
Red
LED
Description
IR Laser mode
Solid
IR laser ON
Visible light
mode
Solid
Blinking
Visible light ON (IR Laser OFF,
touch disabled)
Error
Solid
Error of LD module occurred.
2. If the Problem Is Still Not Resolved:
Try another laser module. If the system now works, the laser module is
defective and in need of a replacement. Please contact your provider.

48
Updated March 2017
Chapter 10. ProColor 550h, 650h, and 700h
Interactive Flat Panel Displays
This guide will cover the above listed interactive flat panel units only.
Imaging Issues
Problem: No image appears when the unit it turned on.
Symptoms: There is no picture displayed on the screen.
Recommended Action(s):
1. Try This First:
Ensure that the unit is connected to AC power. Press the power button on
the front of the unit or the remote and make sure the unit is in the correct
input—you can do this using the source button on the remote.
2. If the Problem Is Still Not Resolved:
Check the source equipment is working correctly and all video cables are
connected correctly. Make sure the source equipment is not in standby or
sleep mode.
3. If the Problem Is Still Not Resolved:
If you are using long cable runs, please try with shorter, direct connections
to see if the problem is resolved. If so, then you will have to troubleshoot
the cable runs.
Issue: Image suddenly turns off.
Symptoms: The image disappears with time.

49
Updated March 2017
Recommended Action(s):
1. Try This First:
Check the Power Save settings on the PC that the unit is connected to,
confirming that it’s not set to sleep. Make sure that the ports are also not
set to sleep.
2. If the Problem Is Still Not Resolved:
Confirm that the outlet is providing power correctly to the display by
swapping out power cords with a known working display, or try using a
different outlet to plug the unit into.
Windows:
1. Press Start > Type Power Options > Click Change
Plan Settings
2. “Turn off the display:” ___ minutes “Put the computer to sleep:” ___
minutes
Mac:
1 Search Spotlight > Energy Saver
50
Updated March 2017
2 “Computer sleep:” ___ min “Display sleep:” ___ min
Problem: There is a bad image quality from the source signal.
Symptoms: Fuzzy, snowy, static in the picture. Image not clear.
Recommended Action(s):
1. Try This First:
Check that source equipment is operating correctly, for instance:
a. All video cables are installed correctly at both ends and not
damaged
(e.g. cable breaks or bend pins inside the connector).
b. Make sure the resolution of the input signal is set to the native
resolution of the ProColor display (1920x1080@60Hz).
Problem: There is a strange coloring of the image displayed.
Symptoms: The image shows in strange green, purple, or rainbow tones.

51
Updated March 2017
Recommended Action(s):
1. Try This First:
Swap the AV cord connected with a known working cord to see if this
allows for the correct colors to show.
Problem: The image is not centered on the display.
Symptoms: Image is shifted on the display.
Recommended Action(s):
1. Try This First:
Power the panel down and turn back on. Remove and reconnect HDMI or
VGA cable.
2. If the Problem Is Still Not Resolved:
Press Menu on the remote and select the Setup option. Select Reset. This
should reset the panel and straighten out the image.
3. If the Problem Is Still Not Resolved:
Try a different resolution on the PC.
Interactivity Issues
Problem: No Touch Function:
Symptoms: There is no interactivity.
Recommended Action(s):
1. Try This First:
Make sure the USB cable is connected to the port on the panel labeled
USB for Touch. Make sure the other end is connected to the computer. If
running a Mac, ensure the Touch Driver is loaded and running. Most PC
computers running Windows 7 or higher will have the Touch Driver built in
to Windows, so a separate driver is not needed in most cases.
2. If the Problem Is Still Not Resolved:
Reboot the computer and then reconnect the USB cable.
3. If the Problem Is Still Not Resolved:
Make sure the unit does not have an internal computer (OPS) installed. If
you are using the internal computer (OPS), make sure that you do not
have another computer connected to the USB for Touch USB connection
on the panel. The panel can only have one USB device accessing the
touch functions at a time, regardless of the source selected.

52
Updated March 2017
Problem: Touch performance is poor.
Symptoms: Slow or erratic touch operation.
Recommended Action(s):
1 Try This First:
a. Make sure there are no unwanted objects in range of the touch
system (e.g. jacket sleeves).
b. Make sure there are no light sources (e.g. halogen lamps) shining
directly at the surface of the ProColor panel.
c. Place your finger or stylus in a 90-degree angle on the touch
surface.
d. Don’t hold the stylus too far towards the tip.
e. Make sure the inside of the bezel (where the touch sensors are
placed) is clean and free of items blocking the view of the sensors.
Problem: Touch functions are slow to respond.
Recommended Action(s):
1. Try This First:
Close all active windows on the PC.
2. If the Problem Is Still Not Resolved:
Reboot the PC.
Problem: Touch function is not calibrated correctly.
Recommended Action(s):
1. Try This First (Windows 7 or above):
When using Windows 7 and above, hit the Windows key, type calibrate,
then choose “Calibrate the screen for pen or touch input” or access this
option from the Control Panel.
After you have chosen “Calibrate the screen for pen or touch input” from
the menu, choose “Calibrate” and continue with the process. This is the

53
Updated March 2017
Windows calibration—if it does not fix the issue, please contact Boxlight’s
tech support.
2. Try This First (Mac):
Open the TouchDriver app and run the calibration. This should improve
the touch functions and calibration.
Problem: Some touch functions do not work on my Mac.
Recommended Action(s):
1. Try This First:
Macs do not have native touch functions, so most of the Mac apps do not
have options of functions for the touch features. Therefore, actions like
using two fingers to zoom into a picture or image will not work on a Mac.
Sound Issues
Problem: There is no sound from my internal computer (OPS).
Symptom: No sound.
Recommended Action(s):
1. Try This First:
Make sure the panel volume is not muted or turned down. Check the PC
audio to ensure it is not turned down or muted. Check the program you
are running (Audio player, YouTube, etc.) to ensure that its volume is not
turned down or muted. Any of these can cause loss of audio.

54
Updated March 2017
2. If the Problem Is Still Not Resolved (with the OPS):
Open an audio player or YouTube and start something that should have
audio (YouTube music videos work very well). Press the Menu button on
the remote for the panel and select the setup option. Then, select the
Internal PC option. Select either OPS or OPS On. Try both options—one
should get the audio working.
Problem: There is no sound when using an external computer.
Recommended Action(s):
1. Try This First:
If using VGA with separate audio cable, make sure it is connected
correctly between the panel and the computer. Be sure to check that the
source of the panel is selected correctly.
2. If the Problem Is Still Not Resolved:
Make sure the panel volume is not muted or turned down. Check the PC
audio to ensure it is not turned down or muted. Check the program you
are running (Audio player, YouTube, etc.) to ensure that its volume is not
turned down or muted. Any of these can cause loss of audio.
Problem: How do I adjust the volume of the panel without a remote
control?
Recommended Action(s):
1. Try This First:
The only way to adjust the panel volume is with the remote. If the remote
is not working, try changing the battery.
2. If the Problem Is Still Not Resolved:
If the remote still does not work, it will need to be replaced.
Installation Issues
Problem: How to install the internal computer (OPS).

55
Updated March 2017
Recommended Action(s):
1. Try This First:
Make sure your ProColor panel is unplugged and free from power. (Early
versions using an OPS may require an external power adapter for OPS
use, which would have been included with your purchase.) On the left side
of your panel, you will find an OPS slot—out of the box, a plate is covering
the slot and held in by 2 screws. Remove these screws and hold onto
them for later. With the ProColor display turned off, insert the OPS
computer—it will only fit into the harness one way. Do not push too hard; if
you do not feel the OPS fit snugly with slight pressure, remove it and try
the other orientation. Make sure to fasten tightly with the screws you
saved earlier. Now, insert the power cable(s) and power up your display
with the remote or red power button on the front of the panel.
2. If the Problem Is Still Not Resolved:
If the OPS does not turn on, ensure that the internal PC function is set to
ON (analog audio) or OPS on (digital audio). You will need to ensure that
this setting is enabled to ON or OPS on for the panel to power the OPS
PC on and off.
The power button on the remote and the red power button on the panel
will now shut off the OPS PC and the display. Please allow time for the
computer to shut down after pressing the power button—this can
sometimes be delayed if automatic updates to windows are enabled.
Do not unplug the panel while the PC or the panel are on.
Hotkey Issues
Problem: Trouble programming the hotkeys on my pen tray.
Recommended Action(s):
1. Try This First:
To program the “Internet Explorer” hot key:
a. Hover over the IE icon on your desktop and right click. Next,
hover over IE and right click again, then choose properties.
b. Put your mouse cursor into the shortcut key section then press
Shift+E on a USB Keyboard (it will show as Crtl + Alt + E).
c. Press Apply.

56
Updated March 2017
To program the On Screen Keyboard hotkey:
a. Hit the windows key, then type On Screen.
b. Hover over the On Screen icon and right click.
c. Select Open file location.
d. This will bring up the file location; right click on the On
Screen Keyboard.
e. Click on the shortcut key section as pictured above.
f. Press Shift+K (it will show as Crtl + Alt + K).
g. Press Apply.
Note: There is no setup required for the right-click function.

57
Updated March 2017
Chapter 11. MimioCapture 2 & 3
Problems Charging the Tray
Problem: The MimioCapture™ tray is not charging.
Symptoms: Green LEDs are not showing on the MimioCapture eraser and pens.
Recommended Action(s):
There are a couple of possible causes for this problem. Try the recommended
actions in the sequence given, until the problem is resolved.
1. Try This First:
It’s possible that the alignment is off between the MimioTeach bar, the
Interconnect cable, and the MimioCapture tray. If the Interconnect cable is
misaligned, there can be a loss of communication between the MimioTeach
device and the MimioCapture tray. See the illustration below:
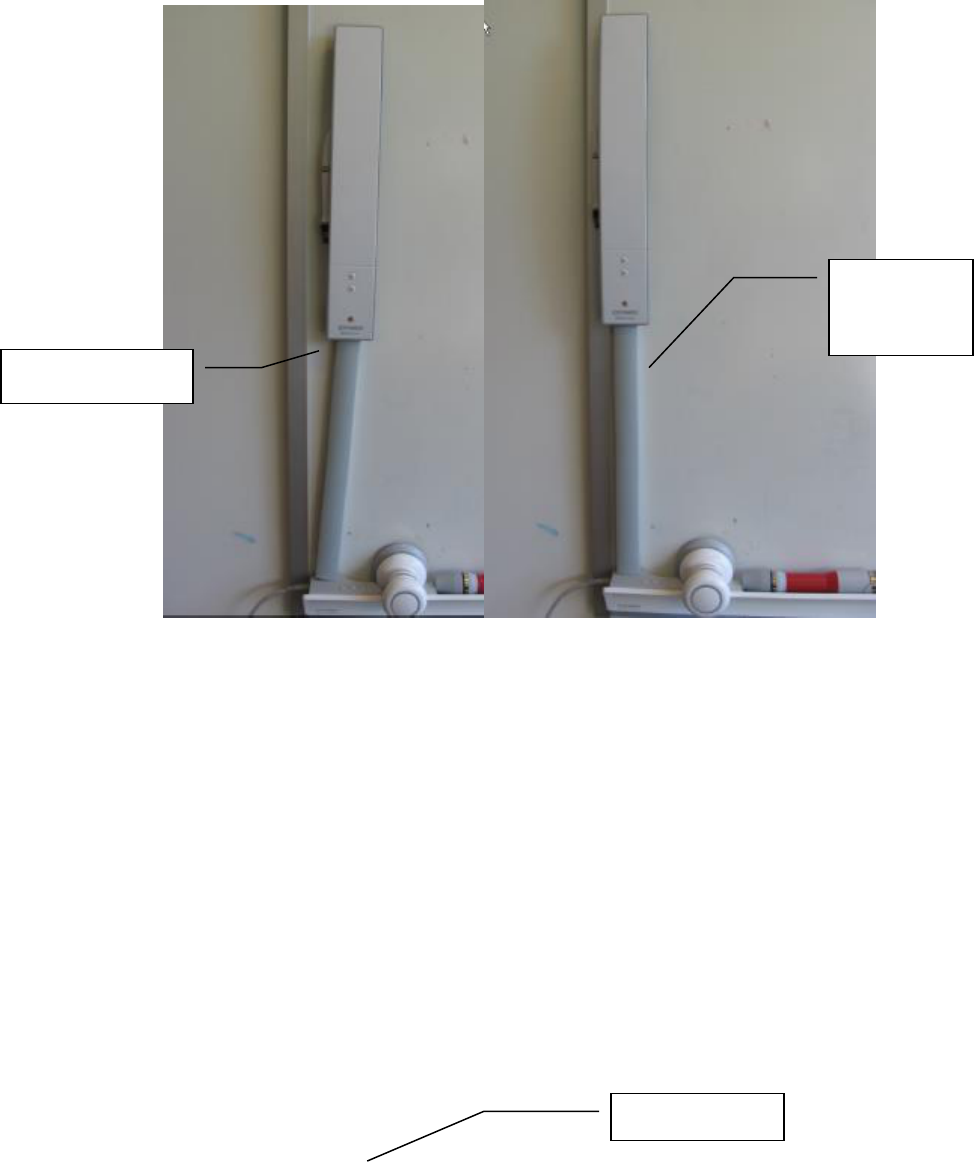
58
Updated March 2017
Ensure that the connection point between the Interconnect cable and the
MimioTeach bar is straight and tight. Also ensure that the connection point
between the Interconnect cable and the MimioCapture Tray is solid and flush.
When the connection is correct, the bar will be directly in line with the
Interconnect cable, and the tray will be perpendicular to the vertical line of the
Interconnect cable. You will see a green LED indicator on the MimioCapture
pens and eraser.
2. If the Problem Is Still Not Resolved:
If the connection between the MimioTeach bar and the Interconnect cable is not
firm, the MimioCapture pens and eraser will not charge in the MimioCapture tray.
The three buttons on the MimioCapture tray could also fail. The probable cause
is that the 3.5 mm male connector on the Interconnect cable is not fully
connecting to the female receptacle on the MimioTeach bar. In this situation,
even a slight movement of the bar or the tray causes the malfunction. See
illustration below:
Misalignment
Proper
Alignment
MimioTeach

59
Updated March 2017
The Mimio parts are interchangeable and can be swapped out with known
working parts. To see whether the MimioCapture tray is causing the problem, try
using another one, if available. The same can be done for the Interconnect cable.
3. If the Problem Is Still Not Resolved:
If no other trays or cables are available to you, or if you continue to experience
issues, please contact custome[email protected] to receive a replacement
MimioCapture tray or Interconnect cable.
Problems with Docked Pens
Problem: The MimioCapture pens show strikes or are engaged with the board
when they are docked in the MimioCapture tray.
Symptoms: Strikes or lines are seen in the software, without writing on the
board.
Recommended Action:
The new MimioCapture pens have a double seal in the cover cap. When you
place the cap on the marker, you should hear two clicks. If you hear only one
click, the cap is not completely tight, and the pen may remain on (buzzing) when
placed in the tray. If one docked pen is on, it will cause any other pens being
used with the system, including the MimioTeach stylus and eraser, to fail.
Only 1 click
Two clicks
Interconnect
cable

60
Updated March 2017
To be sure that the cap is completely closed, use both hands to press inwards.
See the illustration below.
Mounting MimioCapture to a Non-Magnetic Whiteboard
Problem: The MimioCapture tray won’t adhere to a non-magnetic whiteboard.
Symptoms: The MimioCapture tray slides off the board.

61
Updated March 2017
Recommended Action:
You need to use the MimioCapture mounting brackets if your whiteboard is non-
magnetic. For information about mounting the brackets, view the PDF on our
website:
https://mimio.boxlight.com/wp-
content/uploads/2017/03/MountingBracketGuide_Capture.pdf
Note: If your MimioCapture brackets do not match the ones shown in step 2 of
the PDF, please contact customercare@boxlight.com and we will send you a
new bracket set, free of charge.
Amber LEDs on Stylus and Pens/Eraser
Problem: The amber LEDs are lit on the MimioTeach stylus and MimioCapture
pens and eraser.
Symptoms: There is a loss of range when writing, and there are missing lines in
the software.
Recommended Action:
The amber LEDs indicate that the MimioTeach stylus or the MimioCapture pens
and eraser need to be charged. Please note that when the MimioTeach bar is
running on battery power, the stylus will not charge. Please plug the MimioTeach
bar or the MimioCapture tray directly into the computer with the USB cable, or
use the provided USB adapter to plug the bar or tray into the wall so that the
units can charge.
62
Updated March 2017
Chapter 12. MimioView and MimioView HD
MimioView Issues
Problem: The MimioView™ document camera is not acquiring an image.
Symptoms: No image displays in MimioStudio software. You see a flashing
green LED on the MimioView camera.
Recommended Action(s):
There are a number of possible causes for this problem. Try the recommended
actions in the sequence given, until the problem is resolved.
1. Try This First:
Make sure you have the latest version of MimioStudio software. You can
download the latest version of MimioStudio software from the following link:
www.mimio.com/software
2. If the Problem Is Still Not Resolved:
Check to see whether you have a white or a black cable. If it is white, does it
have the USB symbol on both ends of the cable? If so, you may have a defective
cable (see illustration that follows). Please contact customercare@boxlight.com
to receive a replacement cable.

63
Updated March 2017
3. If the Problem Is Still Not Resolved:
If you see a flashing green LED on the MimioView camera, it is an indication that
the camera is receiving power from the USB, but the MimioStudio software is not
detecting the MimioView device. Once the MimioStudio software detects a
MimioView device, the LED should turn to solid green, regardless of whether the
MimioView window is open in MimioStudio software. It is possible that the
MimioView application within MimioStudio software has crashed and needs to be
“forced quit” from within the Windows Task Manager.
To force quit the MimioView application, follow these steps:
a. Open the Windows Task Manager, go to the Processes tab, and sort the
Image Name column alphabetically by clicking on the column header.
b. Look to see if there is an image name called "view.exe." If so, select the
"view.exe" image name and then hit the "End Process" button to kill this
process.
c. After killing "view.exe," unplug the MimioView camera and then reconnect
it to the PC via its USB cable.
Original white cable
that is defective
New white
cable that
is good

64
Updated March 2017
4. If the Problem Is Still Not Resolved:
Do you have the MimioView camera plugged into your computer through a USB
hub? If so, try connecting it directly to your computer and see if that resolves the
issue.
5. If the Problem Is Still Not Resolved:
Try connecting the MimioView camera into another computer running
MimioStudio software, if one is available, and see if that resolves the issue.
6. If the Problem Is Still Not Resolved:
Find the date code on the bottom of the MimioView camera (in the picture below,
10 in the middle signifies the production year and the blacked-out 7 is the
production month). A production year of 11 or later means it’s unlikely to be a
MimioView hardware issue; it’s most likely a cable issue. Please contact
[email protected] to inquire about a replacement cable.
7. If the Problem Is Still Not Resolved:
If replacing the cable does not resolve the issue, please contact
[email protected] to inquire about receiving a MimioView camera.
Securing the MimioView to a Surface
Problem: The MimioView document camera is unsteady.
Symptoms: The MimioView camera keeps tipping over.
Recommended Action:
To secure your MimioView camera, you will need 4 screws. Before installing your
MimioView camera, please verify the following items:

65
Updated March 2017
1. The surface is flat, with no projections.
2. There is no space between the VESA screw holes and the lock
surface (the surface to which you are mounting the camera).
3. The 4 screw holes have the same hole locations as the MimioView
camera.

66
Updated March 2017
MimioView HD
Imaging Issues
Problem: The MimioView HD document camera is not acquiring an image.
Symptoms: No image displays in MimioStudio software, instead there is a
message that says “Waiting for Camera.” You see a flashing green LED on the
MimioView HD.
Recommended Action(s):
There are a few possible causes for this problem. Try the recommended actions
in the sequence provided below until the issue is resolved.
1. Try This First:
The most important thing to check is that you have a version of
MimioStudio on your computer that is compatible with the MimioView HD.
The first version that provided compatibility with the MimioView HD was
MimioStudio 11.4. At this time, we are on MimioStudio 11.53, which is

67
Updated March 2017
available on our website for free: www.mimio.com/software. Once you
have the correct version of MimioStudio on your computer, you can
connect the MimioView HD in and press the launch button (the square) on
the View HD, which should now provide you with the image.
2. If the Problem Is Still Not Resolved:
Swap the USB port that the MimioView HD is connected to. Swapping the
connected USB port can often allow for the drivers to reinstall and the unit
to work as expected.
3. If the Problem Is Still Not Resolved:
Try using a different, known working USB cord with the unit to see if a
different cord allows for the image to be seen. If another, known working
cord allows for the unit to work as expected and the product is within
warranty, the customer should receive a replacement USB cord.
4. If the Problem Is Still Not Resolved:
Try connecting a different, known working MimioView HD to this computer
with the same cord you already have. If the known working unit works with
this computer, then this would mean there’s an issue with the MimioView
and it would need to be replaced for the customer (if it’s still under
warranty).
Problem: No image shown when pressing the launch button.
Symptom: Pressing the launch button on the device doesn’t open the software
up. The MimioView HD continues to flash a green light.
Recommended Action(s):
1. Try This First:
Manually launch the View software through the MimioStudio. The next
time you press the button, it should go back to opening the View
software as expected.
a. On a PC, use the search option from the Start Menu > all
Programs > MimioStudio > Tools > MimioStudio View or by
typing “View” into the Search within the Start Menu.
b. On a Mac, do a Spotlight search (command + Spacebar) for the
View.
Finding the Serial Number
Problem: Finding the MimioView HD serial number location.
Recommended Action(s):
Below is a picture of the serial numbers for the MimioView HD. They are found
on the bottom of the device. The shorter one that starts with a “D” is the
manufacturer’s serial number. The longer one that’s hyphenated is the Boxlight-
Mimio serial number. Please make sure you collect both from the customer in
order to determine the warranty.

68
Updated March 2017
Securing the MimioView HD to a Surface
Problem: The MimioView HD document camera is unsteady.
Symptoms: The MimioView HD camera keeps tipping over.
Recommended Action(s):
To secure your MimioView HD camera, you will need 4 screws. Before installing
your device, please verify the following items:
1. The surface is flat with no projections.
2. There is no space between the VESA screw holes and the lock surface to
which you are mounting the camera.
3. The 4 screw holes have the same hole locations as the MimioView HD.

69
Updated March 2017

70
Updated March 2017
Chapter 13. MimioVote
Station Issues
Problem: The MimioVote™ charging station is not working properly.
Symptoms: The MimioVote handsets blink or do not display the correct slot
numbers.
Recommended Action:
If all of the MimioVote handsets blink, do not illuminate, or do not display the
correct slot numbers when placed in the MimioVote charging station, there may
be a charge pin failure in the station.
Remove the handsets from the slots and gently move your fingers side to side
across the pins. This action may dislodge any recessed charge pins from the
stuck position. If you continue to experience issues, please contact
[email protected] to inquire about a replacement MimioVote charging
station (charges may apply).

71
Updated March 2017
Handset Issues
Problem: A MimioVote handset blinks or does not display the correct slot
number.
Recommended Action:
Try to isolate the defective handset by making sure that another MimioVote
handset works correctly when placed in the same spot. If another handset works
correctly on that same spot, check the battery on the defective handset. Unscrew
the handset and see whether the battery has become loose. If the battery is in
place and the handset still has a blinking back light, contact
[email protected] to inquire about a Return Material Authorization
(RMA) being issued.
Problem: A MimioVote handset has a garbled display.
Recommended Action:
Image 1 – Failed Handset
If a MimioVote handset has a garbled display (like the one shown in Image 1),
the handset has failed. Contact customercare@boxlight.com to inquire about a
replacement handset that will be cross-shipped. Note: The failed handset must
be returned.
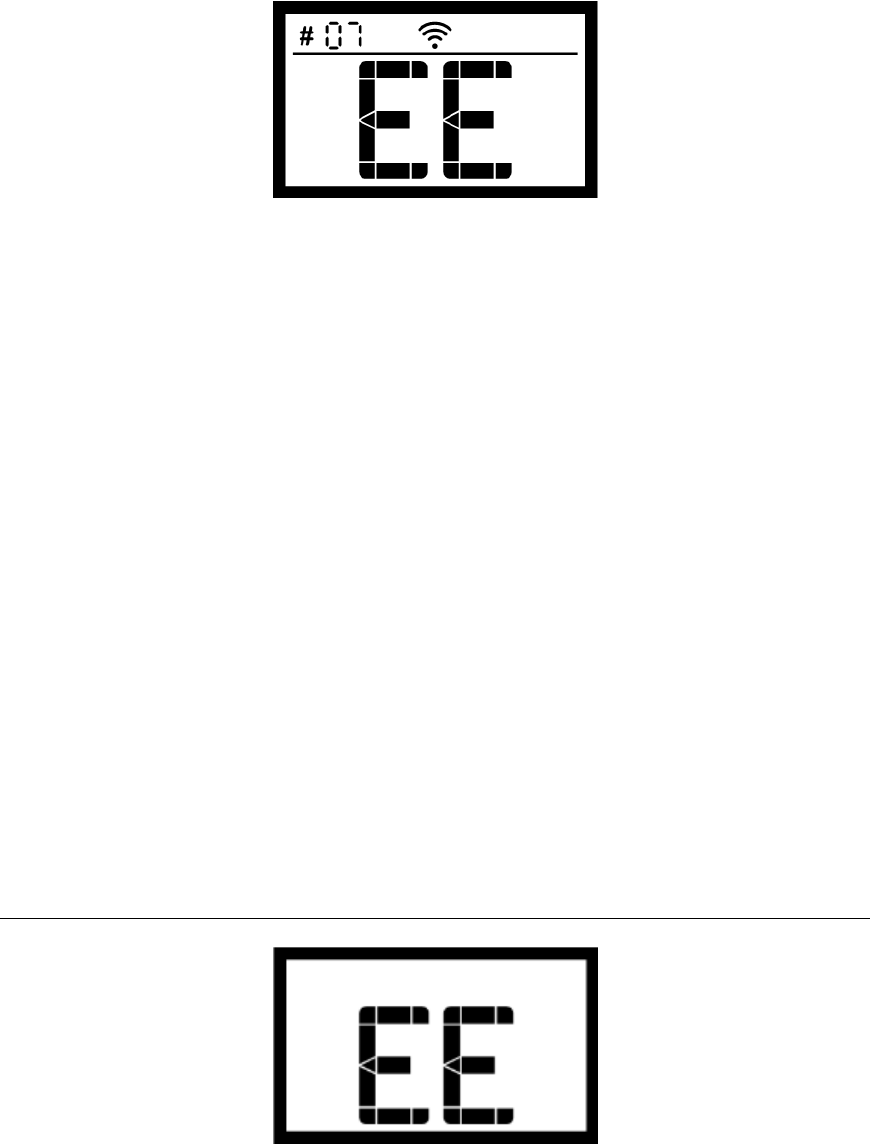
72
Updated March 2017
Image 2 – Invalid ID
Problem: The handset displays an invalid ID.
Recommended Action:
If a handset displays EE with other characters present (as shown in Image 2), the
handset’s ID has been assigned to a different handset. This is normal operation,
which occurs as follows:
1. First, a handset is removed from a slot (for this example, slot # 07). Once
removed from the slot, the handset displays # 07 and begins to
communicate wirelessly with the MimioVote station.
2. Next, a different handset is placed in slot # 07, and then removed. The
second handset now displays # 07.
3. The first handset has now lost the ID 07, and the MimioVote station sends
a wireless signal to it, indicating that its ID is no longer valid.
4. When this message is received, the first handset displays “EE,” with the
previous ID (07) displayed in the upper left corner. The horizontal line
remains on the screen. If the handset is within wireless range of the
station, the radio icon will also be displayed.
To reset the display on the first handset, place it in an available slot in the station.
When you remove it, it should display a valid ID.
Image 3 – Ambiguous Error
Problem: The handset display shows an ambiguous error.

73
Updated March 2017
Recommended Action:
If a MimioVote handset shows EE and no other characters (as shown in Image
3), one of two problems may have occurred. If the handset was removed from
the station while in the middle of a firmware update, it would display “EE.” This is
correct behavior. The handset will recover when it is placed in the station and
allowed to update itself.
However, sometimes a handset loses the ability to successfully complete a
firmware update. When this failure occurs, the handset will attempt to download
firmware every time it is placed in the station. But it will continue to display “EE”
when removed from the station, even though the firmware download has been
allowed to complete. In this situation, the handset has failed. Contact
[email protected] to inquire about a potential replacement handset
that would be cross-shipped. Note: The failed handset must be returned.
Pairing MimioVote
Problem: The MimioVote assessment isn’t pairing with the computer.
Symptoms: The amber light is lit on the MimioVote device.
Recommended Action:
First, verify that the latest version of MimioStudio software is installed. If it is not,
you should update it. You can download the latest version of MimioStudio
software from the following link: www.mimio.com/software. Once you have
updated the software, verify that the MimioHub wireless receiver is connected to
your PC's USB port. Press and hold the power LED button on the MimioVote
charging station until it begins to blink (approximately 20 seconds). Open
MimioStudio Notebook and select the Tools menu Settings Classroom
Devices. The MimioVote device should now show as Available under the Status
column. Select “MimioVote” from the list and then select the Connect button. The
MimioVote status should change to Connected.

74
Updated March 2017
Toolbar Add-in for PowerPoint
Problem: The MimioVote toolbar add-in for PowerPoint is disabled.
Symptoms: The MimioVote toolbar is not displayed.
Recommended Action(s):
1. Try This First:
Microsoft Office applications can disable add-ins that behave unexpectedly while
they are being loaded. If an application does not load your add-in, the application
may have hard-disabled or soft-disabled your add-in. If it has been soft-disabled,
rebooting should solve the problem.
2. If the Problem Is Still Not Resolved:
The add-in has probably been hard-disabled. Determine which version of
PowerPoint you have before proceeding.
For PowerPoint 2010, please do the following:
1. Launch PowerPoint 2010.
2. Choose File Options Add-Ins.
3. In the Manage box, click COM Add-ins, and then click Go.
4. In the COM Add-ins windows, click Add.
5. Look in for "crs_powerpoint.dll" at C:\Program
Files\mimio\MimioStudio\system.
6. Select crs_powerpoint.dll and click OK.
7. Make sure “mimio Vote” is selected, then click OK.

75
Updated March 2017
For PowerPoint 2007, please do the following:
1. Open PowerPoint 2007 and click the Microsoft Office Button.
2. Click the PowerPoint Options button.
3. In the categories pane, click Add-ins.
4. In the Manage box, click COM Add-ins, and then click Go.
5. In the COM Add-ins windows, click Add.
6. Look in for "crs_powerpoint.dll" at C:\Program
Files\mimio\MimioStudio\system.
7. Select crs_powerpoint.dll and click OK.
8. Make sure “mimio Vote” is selected, and then click OK.
For PowerPoint 2003, please do the following:
1. Open PowerPoint 2003.
2. On the Tools menu, click Customize.
3. Click on the Commands Tab.
4. Under the Categories heading, select Tools.

76
Updated March 2017
5. Under the Commands heading, scroll down until you see Com Add-Ins.
6. With the left mouse button, click and hold down on the Com Add-Ins icon.
7. While holding down on the left mouse button, drag the Com Add-Ins icon
up to the toolbar in PowerPoint.
8. Double-click on the Com Add-Ins icon that appears in the PowerPoint
toolbar.
9. In the COM Add-ins windows, click Add.
10. Look in for "crs_powerpoint.dll" at C:\Program
Files\mimio\MimioStudio\system.
11. Select crs_powerpoint.dll and click OK.
12. Make sure “mimio Vote” is selected, and then click OK.

77
Updated March 2017
Chapter 14. The MimioPad (2
nd
Generation)
Pairing the MimioPad and USB Wireless Receiver
Problem: The MimioPad™ tablet isn’t pairing with the USB wireless receiver.
Symptoms: The MimioPad tablet is not displaying the wireless signal.
Recommended Action:
If your MimioPad tablet becomes unpaired from the USB wireless receiver for
any reason (such as replacing your receiver), you can manually pair them up
again.
1. Verify that MimioStudio 10 or above software is installed.
2. Verify that the wireless USB receiver is connected to your PC's USB port.
3. Press and hold the power LED button on the MimioPad tablet until it begins
to blink (approximately 10 seconds).
4. Open MimioStudio Notebook.
5. Select the Tools menu, and then select Settings.

78
Updated March 2017
6. Select Classroom Devices. “MimioPad” should show as Available
under the Status column.
7. Select “MimioPad” from the list and then select the Connect button.
The MimioPad status should change to Connected.
Making MimioPad a Teacher or Student Pad
Problem: How do you make the MimioPad tablet a teacher or student pad?
Recommended Action:
1. Verify that MimioStudio 10 or above software is installed.
2. Open MimioStudio Notebook.
3. Select the Tools menu, and then select Settings.
4. Select Tablet Devices; you will see all available MimioPad devices.

79
Updated March 2017
5. Select any MimioPad device, then right-click and you will see the option to
make that MimioPad device a student or teacher pad.

80
Updated March 2017
Chapter 15. MimioPad (1
st
Generation)
MimioPad Issues
Problem: The MimioPad wireless tablet is defective.
Symptoms: The MimioPad tablet is not working.
Recommended Action(s):
1. Try This First:
If you have another MimioPad tablet, stylus, and USB wireless receiver available
to you, you can try to isolate the problem through the process of elimination.
Switch the components one at a time.
• If the USB receiver seems to be at fault:
Try reinserting the original one and see whether it now works. If it does not,
contact customercare@boxlight.com to inquire about a replacement wireless
receiver (replacement hardware is not guaranteed).
• If the stylus seems to be at fault:
Replacing the stylus battery should fix the problem. The stylus takes one AAA
battery. If a new battery does not help, contact customerca[email protected] to
inquire about a replacement stylus.
• If the tablet seems to be at fault:
Try re-pairing the MimioPad and the USB receiver.
2. If the Problem Is Still Not Resolved:
If you continue to experience issues, please contact customercare@boxlight.com
to inquire about a replacement MimioPad tablet.

81
Updated March 2017
Pairing the MimioPad (1
st
Generation) and USB Wireless
Receiver
Problem: The MimioPad tablet isn’t pairing with the USB wireless receiver.
Symptoms: The MimioPad tablet is not displaying the wireless signal.
Recommended Action:
If your MimioPad tablet becomes unpaired from the USB wireless receiver for
any reason (such as replacing your receiver), you can manually pair them up
again.
The pairing process is as follows:
1. Power on the MimioPad tablet.
2. Plug the MimioPad USB wireless receiver into a USB port on your
computer.
3. Press and hold the red Learning button on the back of the MimioPad
tablet for 5 seconds, or until the number section on the LCD on the front
of the tablet starts to flash. This initiates the pairing process.
4. While the number section on the LCD on the MimioPad tablet is flashing,
quickly press and hold down the recessed Learning button on the
MimioPad USB wireless receiver.
Note: The number section on the LCD on the MimioPad tablet must be
flashing when the Learning button on the Mimio USB wireless receiver is
pressed, or the pairing process will not be successful.
5. Once the USB wireless receiver and the MimioPad tablet are connected,
the MimioPad LCD will show the number assigned to any additional
MimioPad tablet(s). The numbers on each MimioPad tablet will display
according to the order in which it is paired to the receiver.
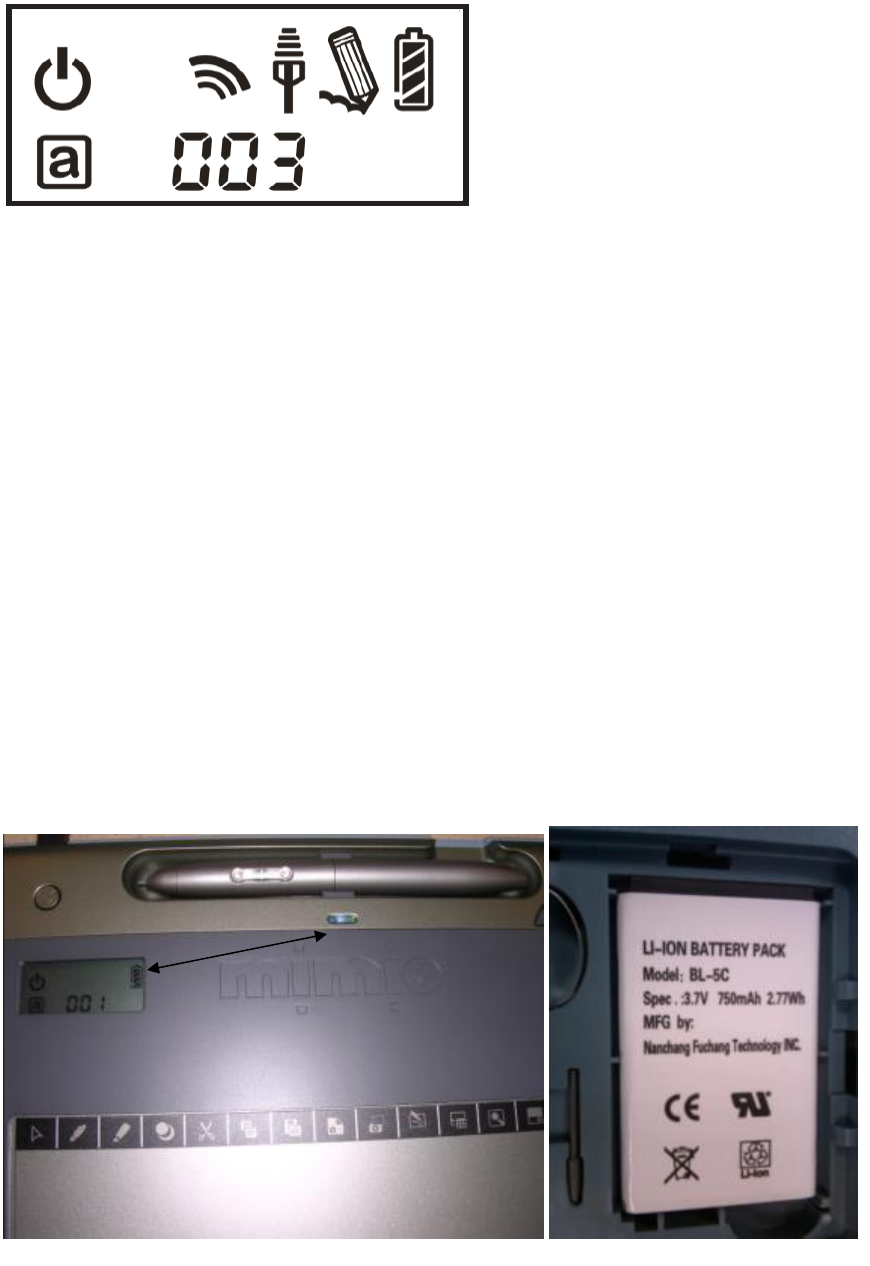
82
Updated March 2017
Note: You can pair a maximum of 30 MimioPad tablets to the same USB
wireless receiver.
Flashing Blue Light
Problem: The MimioPad tablet has a flashing blue light.
Symptoms: There is a blinking blue LED on the MimioPad tablet.
Recommended Action(s):
1. Try This First:
The MimioPad tablet should show a steady blue light when the battery is
charging, and the light should go off once the battery is fully charged. A blue
flashing light indicates that either the battery is not inserted correctly or it is not
charging. This can occur when the battery pack is not seated correctly in the
tablet. Remove the battery cover on the tablet and make sure the battery pack is
seated properly. Once it is seated correctly, you should see a steady blue LED,
and the battery icon should appear on the display.

83
Updated March 2017
2. If the Problem Is Still Not Resolved:
The problem could be that the battery is defective. If it is properly seated and will
not charge, please contact [email protected] to inquire about a
replacement battery (charges may apply).
Pop-Up Messages
Problem: There is writing hesitation/lag, and pop-up messages appear when
using the MimioPad tablet on the Windows 7 operating system.
Symptoms: There is hesitation/lag when writing on the MimioPad tablet, and the
words "back," "forward," "drag up," and "drag down" appear.
Recommended Action:
1. To clear those messages away, disable the Tablet PC Input Panel. To do
so, click on the Start button and type in “Tablet PC Input Panel.” Click on
“Tablet PC Input Panel” and the input panel will appear.

84
Updated March 2017
2. Next, click on Tools Options.
3. Click on the “Opening” tab. Under “Choose where to show the Input Panel
icons and tab,” uncheck the first three options. Click on Apply and then on
OK to close out the input panel.
4. With the MimioPad USB receiver plugged in, click on the Start button and
type in “Flicks.” On the next screen, click on “Turn flicks on and off” and
the “Pen and Touch” dialog box will appear.

85
Updated March 2017
5. Click on the “Flicks” tab and uncheck “Use flicks to perform common
actions quickly and easily.” Then click Apply and OK to close the dialog
box.

86
Updated March 2017
Chapter 16. MimioMobile
Networking MimioMobile with MimioStudio
Problem: There is an error message stating "connection problem - problem with
connection between MimioMobile and MimioStudio."
Recommended Action(s): The MimioMobile app for the iPad must be
connected using the school's Wi-Fi network. First, verify the following:
a. The computer must have MimioStudio 10 or above software installed and
must be on the same Wi-Fi network as the iPad.
b. The MimioMobile app must be activated using the license number issued
when it was purchased.
c. There should be no firewalls blocking access to the network.
d. Any VPN should be disabled.
Next, try the following:
1. Exit out of mimiosys.exe and force close the MimioMobile app. Then
reopen both.
2. Find another wireless network to connect both the iPad and the computer.

87
Updated March 2017
Making an iPad a Teacher or Student Pad
Problem: How do I make my iPad a teacher or a student pad?
Recommended Action(s):
1. Verify that MimioStudio 10 or above software is installed.
2. Make sure you have downloaded the MimioMobile app from the
iTunes App Store onto the iPad.
3. Open MimioStudio Notebook.
4. Select the Tools menu, and then select Settings.
5. Select Mobile; you will see a QR code.
6. Make sure the computer and the iPad are using the same wireless
network.
7. Scan this code with the iPad MimioMobile app to make the iPad a
teacher pad.
8. To make the iPad a student pad, select Take Attendance and select
a class under Tools Application. Then, scan this code with the
iPad MimioMobile app to make the iPad a student pad.

88
Updated March 2017
Chapter 17. MimioBoard
MimioBoard Installation
Problem: How do I install the MimioBoard interactive whiteboard?
Recommended Action:
For information about installing the MimioBoard interactive whiteboard, see
Chapter 2 of this PDF on our website:
https://mimio.boxlight.com/wp-content/uploads/2016/09/MimioBoard_UG_en.pdf.
Replacing the MimioTeach on the MimioBoard
Problem: How do I swap out the MimioTeach bar on the MimioBoard device?
Recommended Action:
If necessary, you can remove the integrated MimioTeach bar from the
MimioBoard device and replace it with a new MimioTeach bar.
You will need the MimioTeach replacement tools that came in the MimioBoard
package, and a screwdriver.
To remove the MimioTeach bar:
1. Remove the MimioBoard frame pieces from above and below the
MimioTeach bar.
2. Unplug the cable from the MimioTeach bar.
3. Using the included Allen wrench, do the following:
a. Remove the screw below the MimioTeach bar.

89
Updated March 2017
b. Remove the screw above the MimioTeach bar.
4. Remove the MimioTeach bar from the MimioBoard device. Locate the
two metal plates on the back of the MimioTeach bar.
5. Remove the two screws that hold each of the metal plates in place.
6. Remove the metal plates from the MimioTeach bar.
To replace the MimioTeach bar:
1. Place the metal plates against the back of the MimioTeach bar. Make
sure that the recess on each plate is inserted into the recess on the
back of the MimioTeach bar.
2. Using a screwdriver and two screws per plate, attach the plates to the
MimioTeach bar.
3. Plug the MimioBoard cable into the MimioTeach bar.
4. Place the MimioTeach bar on the MimioBoard device.
5. Using the included Allen wrench, do the following:
a. Insert one screw in the hole above the MimioTeach bar.
b. Insert one screw in the hole below the MimioTeach bar.
6. Replace the MimioBoard frame pieces above and below the
MimioTeach bar.
90
Updated March 2017
Chapter 18. Mimio Interactive Xi
Calibration Issues
Problem: The Mimio Interactive Xi™ system isn’t calibrating properly.
Symptoms: Missing calibration points. Strikes or missing lines in software.
Recommended Action(s):
1. Try This First:
The problem may be due to ultrasound interference from an environmental
source. Please test for environmental interference, following the instructions later
in this chapter.
2. If the Problem Is Still Not Resolved:
Try replacing the battery in the stylus pen with a new battery.
3. If the Problem Is Still Not Resolved:
If you have another Mimio interactive device available, try calibrating it to see
whether the problem is specific to the malfunctioning Mimio Xi system. If the
Mimio Xi system appears to be defective, please contact
Pairing Mimio Xi Wireless Components
Problem: The Mimio Interactive Xi system isn’t pairing with the wireless
components.
Symptoms: An amber light is lit on the Mimio Interactive Xi system.
Recommended Action:
There are two generations of Mimio Xi wireless, each of which has a different
form factor for the wireless USB receiver, also referred to as the “wireless
dongle.” The first-generation Mimio Xi wireless used a small black box for a
wireless receiver, which was connected to the computer with a short mini-B USB
cable. The current Mimio Xi wireless has a wireless receiver with a Flash drive
form factor (see photo).

91
Updated March 2017
NOTE: The wireless components from the first-generation Mimio Xi wireless are
not compatible with the components from the second-generation Mimio Xi
wireless.
• If you have the Flash drive form factor receiver (dongle)
The dongle plugs into the computer's USB port. If the wireless USB receiver is
receiving power, it should show a solid green LED light. NOTE: A solid green
LED does not indicate a successful wireless pairing.
The wireless module connected to the Mimio Xi device has 2 LEDs at its base.
The top LED, with the radio tower icon next to it, is the wireless link status
indicator. If there is a wireless link with the receiver, the top LED will be solid
green. If it is flashing or amber, there is no connection with the wireless receiver,
and re-pairing may be necessary. The bottom LED, with the pen icon next to it, is
the pen activity indicator. When a wireless link is established, this LED will flash
green when in an idle state, and will turn solid green when a Mimio stylus is in
use. This LED will not show an amber light.
To pair the wireless receiver with the wireless module, follow these steps:
1. Confirm that the Mimio wireless components being used together are the
same version (i.e., DMA-02-03 and DMA-02-03M work together, as do
DMA-02-02 and DMA-02-02M). Also confirm that both components have
the same 2-digit version number. This information can be found on the
label on both wireless components.
2. Unplug the wireless receiver from the computer’s USB port and plug it into
a different USB port.
3. On the wireless receiver/dongle, depress the small button with the tip of a
fingernail or pen tip, until the LED begins flashing (~ 4 seconds).
4. Within 30 seconds, depress the recessed button beneath the power LED
on the Mimio Xi device for 1 second, until you hear a beep.
Mimio Xi
Wireless Module
USB wireless
receiver (dongle)

92
Updated March 2017
5. The wireless link status LED on the Mimio Xi device will turn to solid
green.
• If you have the small black box form factor receiver (dongle):
To pair the wireless receiver with the wireless module, follow these steps:
1. There is no LED on the black box. Bend a paperclip wire open, stick it in
the small hole on the flat face of the box, and hold it there for 1 second.
2. Within 30 seconds, depress the recessed button beneath the power LED
on the Mimio Xi device and hold it for 1 second, until you hear a beep.
3. The wireless link status LED on the Mimio Xi device should turn to solid
green.
Environmental Interference
Problem: There is environmental interference with the Mimio Interactive Xi device.
Symptoms: The Mimio Xi device is not calibrating properly.
Recommended Action:
Perform an environmental analysis test for infrared and ultrasound interference in
the room. Follow the steps below for your operating system.
For Windows:
1. From MimioStudio 10 software for Windows, select Tools Settings.
2. Click on the Ink Capture icon on the left, and select Settings.
3. Select Test for both infrared and ultrasound.
4. If either test fails, there may be interference. See Recommended Action,
below.
For Mac:
1. From MimioStudio 10 software for Mac, select Notebook from the header
Preferences.
2. Click on the Ink Capture icon on the left, and select Settings.
3. Select Test for both infrared and ultrasound.

93
Updated March 2017
4. If either test fails, there may be interference. See Recommended Action,
below.
• Recommended Action for Ultrasound Interference:
The most common interference is ultrasound, which is typically caused by
occupancy sensors used to control lighting in a room. The Wattstopper, Leviton,
Novitas, and Hubbell Automation brand dual-technology sensors all interfere with
the Mimio device because the ultrasound is transmitted at a frequency very close
to that of the Mimio stylus pens (40 kHz).
If you know where the motion sensor is located (it’s typically on the ceiling
towards the center of the room), try covering it and testing again to see if the
interference is eliminated. If covering the sensor allows the Mimio device to work,
the long-term solution is to remove or replace the occupancy sensor with a
sensor that does not utilize ultrasonic technology. SensorSwitch brand
occupancy sensors utilize dual-technology that does not interfere with the Mimio
device.
• Recommended Action for Infrared Interference:
Infrared interference is uncommon, but can be caused by a plasma display in use
nearby. Powering off the plasma display will permit the Mimio device to work
correctly. Infrared interference can also be caused by light fixtures that are
located directly above the Mimio device and whiteboard. Try turning off the
closest lights and test again to see if the interference is eliminated. If lighting
continues to be an issue, consider upgrading to a MimioTeach interactive bar.
The least likely cause of infrared interference is direct sunlight on the Mimio
device (at sunrise or sunset). If that seems to be the case, change the orientation
of the Mimio device to get it out of direct light.

94
Chapter 19. MimioStudio
MimioStudio Issues
Problem: My MimioStudio software is frozen or keeps crashing.
Symptoms: The MimioStudio software is not responding.
Recommended Action:
Make sure you have the latest version of MimioStudio software. You can
download it from the link below. By using this link, the website will register
your email address as a user and you will receive an email whenever a new
version of the software is available. You can also get documentation and
various manuals from this location:
www.mimio.com/software
If the Problem Is Still Not Resolved:
Please contact customercare@boxlight.com.
Installation Issues − Windows
Problem: Trouble installing MimioStudio software on Windows.
Symptom: Installation is not successful.
Updated March 2017
95
Updated March 2017
Recommended Action:
Before you attempt to install the software, please do the following:
1. Turn off anti-virus software during the installation.
2. Make sure the software is run with Administrative Privileges.
3. Make sure to End Process for mimiosys.exe on the Task Manager.
4. If you have auto-update enabled, then turn off User Access Control from
User Accounts in the Control Panel. See below:
To turn off User Access Control in Windows 7 & 8:
1. Click Start Control Panel User Accounts (click User Accounts again,
if available).
2. Choose “Change User Account Control” settings.
3. Move slider all the way down to “Never notify.”
4. Click OK.
To turn off User Access Control in Vista:
1. Click Start Control Panel User Accounts (click User Accounts again,
if available).
2. Click “Turn User Account Control on or off.”
3. Uncheck box “Use UAC to help protect your computer.”
4. Click OK.

96
Updated March 2017
Problem: Upgrading from MimioStudio 9 software to MimioStudio 10 software.
Recommended Action:
If you are running into problems upgrading from version 9 to version 10, perform
a fresh install.
1. First export any saved Gallery content. To do so, open up MimioStudio
Gallery and click on the Export Content Pack. Save the MCF file.
2. Go to Control Panel Add/Remove Programs and uninstall MimioStudio
software.
3. Go to C:\Program Files and delete the Mimio folder.
4. Download MimioStudio 11 software from the website and save it to your
desktop before installing: www.mimio.com/software

97
Updated March 2017
5. Once the latest version of MimioStudio software is installed, you can
import your content pack by opening the Gallery, clicking on the Import
Content Pack icon, and searching for the MCF file.
Installation Issues – Mac
Problem: Trouble installing MimioStudio software on Mac.
Symptoms: Installation is not successful. Error message is received: “Installation
cannot be completed with MimioStudio currently running.”
Recommended Action:
Before you attempt to install the software, please do the following:
1. Make sure no Boxlight Mimio products are running in the dock or in the
system tray in the top right corner.
2. Save your Gallery before deleting the Mimio folder. Open up MimioStudio
Gallery, click on the Export Content Pack, and save the MCF file.
3. Next, delete the following folders and files:
a. Go to Macintosh HD/Utilities/Activity Monitor, search for “mimiosys,”
and Quit Process.
b. Go to Macintosh HD/Applications and delete any Mimio folders from
there.
c. Go to Macintosh HD/Library/Preferences and delete any files that start
with “com.mimio.”
d. Go to Macintosh HD/Users/UserName/Library/Preferences and delete
any files that start with “com.mimio.” Also delete the Mimio folder in
there.
e. Go to Macintosh HD/Users/Shared and delete the Mimio folder there.

98
Updated March 2017
f. From the Go Header/Go to Folder, type in /private/var/db/receipts and
then delete the Com.mimio/mimiosys.bom &
Com.mimio.mimiosys.plist.
4. Download MimioStudio software from www.mimio.com/software. Be sure
to save it to your desktop before installing.
Unknown Publisher Security Warning
Problem: Internet Explorer is giving an Unknown Publisher security warning.
Symptoms: Security warning appears when I try to download the new software.
Recommended Action:
You will see this security warning if you are using the Internet Explorer browser
and you select Run. In this situation, download and save the file to your desktop,
instead of selecting Run.
Playing Multimedia Files
Problem: Cannot view the MP4 videos that are in an INK file.
Recommended Action:
Automatic playback is supported when you have the supported CODECS on your
computer. For example, for Windows users with Windows Media Player,
MimioStudio software will automatically play a WMV file inside Notebook.
Similarly, MimioStudio software will automatically play MOV files for Mac users

99
Updated March 2017
with the default QuickTime program installed. Linux also has a default media
player for MimioStudio software to leverage. If the required CODEC cannot be
found, you will get an alert message advising you that you need to download the
CODEC in order to play various file types. To search for and download the
proper CODECS, go to http://www.filecluster.com/downloads/K-Lite-Codec-
Pack.html.
Adobe Flash Player
Problem: MimioStudio software on Windows is crashing randomly with Adobe
Flash Player 11.
Problem: Multimedia files will not work, even though Flash Player is installed.
Error message: "Flash player must be installed in order to use Flash files in the
MimioStudio Notebook.”
Recommended Action:
These issues were resolved with the release of MimioStudio 10.0 software, which
has Adobe Flash bundled within it. Flash files now play seamlessly, and work
without interruption when Adobe releases a new version. You should install the
latest version of MimioStudio software, which you can download from the
following link: www.mimio.com/software. When we move to future versions of
MimioStudio software, we will continue to bundle the latest version of Adobe
Flash with it.
MimioStudio Recorder
Problem: This error message keeps appearing: "Error removing previously
recorded video. Make sure that the video is not opened in another application.”
Recommended Action:
We have determined that the audio of the MimioStudio Recorder is causing this
issue. There are two options for fixing this:
1. Plug in a microphone.
2. Go into MimioStudio Settings Recorder Audio Quality. Change the
setting to "No Audio."

100
Updated March 2017
MimioStudio ActivityWizard
Problem: When trying to use MimioStudio ActivityWizard, this error message
appears: “Unable to create activity based on current language setting.”
Recommended Action:
Change the Language setting under MimioStudio Settings to match the language
of your operating system.

101
Updated March 2017
Problem: When the ActivityWizard icon is clicked, this error message appears:
"Unable to create a new activity. No data available for activity creation."
Recommended Action:
This error message appears if MimioStudio software has been installed
without administrative privileges. Per the MimioStudio 10 Release Notes: "Auto-
update fails if the user does not have administrative privileges. MimioStudio
software will attempt to update and it will appear that the update has been
successful. However, the software update will fail if administrative rights are not
set." To set administrative privileges, do the following:
1. Go to Start Run and type in regedit.
2. The Registry Editor screen appears. Click Edit Permissions.
3. On the next screen, make sure administrators have “Full Control” and
“Read” checked in the boxes under “Allow.”

102
Updated March 2017
Importing a Student List into MimioStudio Gradebook
Problem: “Invalid File” error message appears when trying to import a student
list into MimioStudio Gradebook.
Recommended Action:
You can import students from a Unicode text file (TXT) or a comma-separated
value file (CSV). In order to be imported, each student must have at least a first
or last name assigned to him or her. Whether or not you use all the columns, the
header must contain all the fields.
The following fields are supported for importing into Gradebook:

103
Updated March 2017
• StudentID
• FirstName
• MiddleName
• LastName
• Gender
• Birthdate
• Address
• City
• State
• Zipcode
• Country
Each student that you add to a class will automatically be assigned a MimioVote
unit number.
To import a class list, follow these steps:
1. In Gradebook, display the class into which you want to import the student
list.
2. From the File menu Import Students. The Open dialog box
appears.
3. Navigate to and select the file you want to import, and then click “Open.”
The list of students is imported and displayed in the Gradebook.
Importing Word, PowerPoint, or PDF Documents
Problem: Cannot import a Word, PowerPoint, or PDF file into MimioStudio
software.
Recommended Action(s):
1. Try This First:
Make sure the latest version of MimioStudio software is installed. You can
download it from the following link: www.mimio.com/software
If the Problem Is Still Not Resolved:
Please follow these steps:
a. First, make sure that the PowerPoint, Word, and Adobe Acrobat
applications (not viewers) are installed and are not running. Go to
Windows Task Manager, highlight the appropriate application(s)—
PowerPoint, Word, and/or Adobe Acrobat—and click “End Process.”

104
Updated March 2017
b. Close MimioStudio Notebook, and then go to the Printers folder in
the Control Panel.
c. Look for "mimio Print Capture" in the list and delete it.
d. Open MimioStudio Notebook. It should re-create the Mimio Printer.
e. Try importing the file(s) again.
2. If the Problem Is Still Not Resolved:
Try doing a fresh installation of MimioStudio software.
a. First export any saved Gallery content. To do so, open up MimioStudio
Gallery and click on the Export Content Pack. Save the MCF file.
b. Go to Control Panel Add/Remove Programs and uninstall MimioStudio
software.
c. Go to C:\Program Files and delete the Mimio folder.
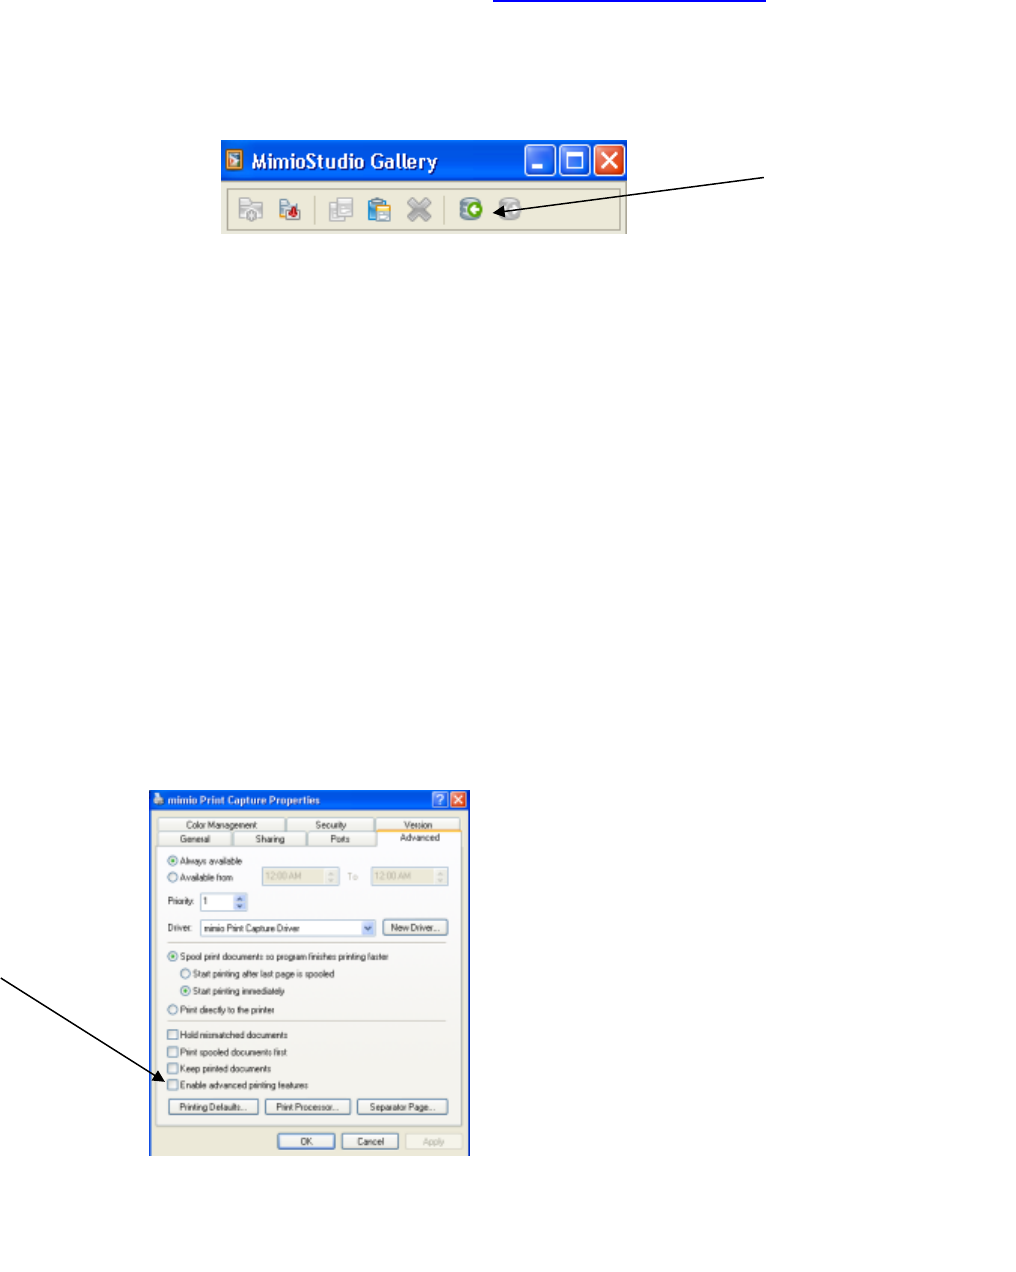
105
Updated March 2017
d. Download MimioStudio software from the website and save it to your
desktop before installing: www.mimio.com/software
e. Once the latest version of MimioStudio software is installed, you can
import your content pack by opening the Gallery, clicking on Import
Content Pack icon, and searching for the MCF file.
f. Try importing the files again.
Display of an Imported PDF
Problem: Some PDF files do not display correctly when imported into
MimioStudio software.
Recommended Action:
1. Go to Start Menu Printers and Faxes.
2. Right-click on the mimio Print Capture and select Properties (in Windows
7, select Printer Properties).
3. Go to the Advance tab and disable the option "Enable advanced printing
features," then click on Apply.

106
Updated March 2017
Chapter 20. Frequently Asked Questions
Where can I find the latest version of MimioStudio software?
Answer:
You can download the latest version of MimioStudio software from the following
link: www.mimio.com/software. By using this link, the website will register your
email address as a user and you will receive an email whenever a new version
of the software is available. You can also get documentation and various
manuals from this location.
How do I export and import my MimioStudio Gallery?
Answer:
Entire Gallery folders can be exported from and imported into the MimioStudio
Gallery as Gallery (MCF) files. You can then share Galleries that you have
created with other MimioStudio users. MimioStudio software does not support
network or shared galleries.
To export a Gallery folder from a Gallery file:
1. Select the Gallery folder to export.
2. Click the Export Content Pack button.
3. From the Save As dialog box, enter a name for the file in the File Name
box.
4. Select a location to save the file to.
5. Click “Save.”
To import a Gallery folder into a Gallery file:
1. Click the Import Content Pack button.
2. From the Open dialog box, navigate to and select the Gallery file to import.
3. Click “Open.” The contents of the Gallery file are added to the Imported
Content Packs folder in MimioStudio Gallery.
107
Updated March 2017
4. Review the imported content and make any desired changes.
5. To move the content to the Gallery folder, right-click the folder and then
choose “Install.” The content is moved to the Gallery folder.
Why should I export my Gallery?
Answer:
If you wish to save your Gallery content, you will need to export it whenever a
fresh installation of MimioStudio software is needed. It is sometimes necessary to
uninstall and reinstall the software to resolve problems that may occur with the
software. Note: It is not necessary to export your Gallery when performing a
simple software update.
How can I create my own activities using MimioStudio
ActivityWizard?
Answer:
ActivityWizard, a feature that became available with MimioStudio 9 software,
automates the creation process for you, calling out the steps to design high-
quality, effective instruction in minutes. You simply choose a subject, grade level,
template, and topic. The Knowledge Engine then goes to work to automatically
populate your activity with relevant facts and images. The ActivityWizard tool is
based on proven instructional design principles, and will call out critical
components for creating effective instruction. Lesson creation doesn’t get any
easier.
Does MimioStudio software work on virtual desktops?
Answer:
We do not support virtual desktops. In most cases, a virtual desktop is basically
just an empty shell of a computer. These machines are hooked up to a “server
machine,” which supplies the brains. Everyone can access only what is available
on that single machine. Most virtual desktops are meant for student use or for
teachers who want a central repository. Usually there are not even USB ports on
a machine like this, beyond what may be needed for a possible keyboard or
mouse. Without enough USB ports, these machines can’t even support Boxlight
Mimio hardware, let alone the software. MimioStudio software can be accessed
and used by a client machine as a server-based application, but control of a
Boxlight Mimio hardware device connected via USB (cable or wireless receiver)
would require loading the driver on client hardware—which would require local
MimioStudio installation.
Can I import SMART and Promethean files?

108
Updated March 2017
Answer:
MimioStudio software can import both SMART and Promethean files. It is able to
support many of the common aspects of these file types, allowing teachers to
open, view, and edit them. However, many SMART and Promethean files have
unique programming that does not allow full compatibility for all interactive
aspects, including certain background types and some Flash animations. At this
point in time—with MimioStudio 11.53—MimioStudio Notebook is about 97%
compatible with SMART and Promethean files. If you have trouble importing a
specific file, please let us know by reaching out to us at
[email protected], making sure to include the file as well as the issue
you see when it’s opened in MimioStudio Notebook. You can download and
install MimioStudio 11.53 by going to our download page here:
www.mimio.com/software
What languages does MimioStudio software support?
Answer:
MimioStudio educational software is available in 33 languages: English, Arabic,
Bahasa Indonesian, Bahasa Malay, Basque, British English, Catalan, Chinese-
Simplified, Chinese-Traditional, Croatian, Danish, Dutch, Finnish, French,
German, Greek, Hebrew, Hindi, Hungarian, Italian, Japanese, Korean,
Norwegian, Polish, Portuguese (Brazil), Portuguese (Portugal), Romanian,
Russian, Slovak, Spanish, Swedish, Turkish, and Vietnamese. MimioStudio
software can be installed and run across multiple platforms, including Windows,
Linux, and Macintosh operating systems.
How can I switch languages?
Answer:
To switch languages, change the Language setting under MimioStudio Settings.
Note that the language should match the language of your operating system.
How can I use multiple MimioVote stations?
Answer:
Two MimioVote assessment devices can be paired to form one 64-unit
MimioVote device. One set of handsets will be numbered 1-32 and the other 33-
64. To pair the two MimioVote devices with the software, follow these instructions
for each MimioVote device:
1. Press and hold the power LED button on the MimioVote charging
station until it begins to blink (approximately 20 seconds).
109
Updated March 2017
2. Open MimioStudio Notebook and select the Tools menu Settings
Classroom Devices. The MimioVote device should now show as Available
under the Status column.
3. Select “MimioVote” from the list and then select the Connect button. The
MimioVote status should change to Connected.
What is the maximum number of MimioVote handsets you can
use in a classroom?
Answer:
You can combine two trays of 32 handsets, for a maximum of 64 handsets per
classroom.
How can I export MimioStudio Gradebook to my school’s grade
book system?
Answer:
Users can export the Class Information, Student Information, and Activity Results
as text (TXT) files for use in other applications.
]
Is it possible to receive MimioStudio software updates
automatically?

110
Updated March 2017
Answer:
You can receive notification of MimioStudio software updates as follows:
1. Open MimioStudio Notebook.
2. Go to Tools Settings Software Updates.
3. Put a check mark in the box “Notify me when updates are available.”
Does the MimioStudio handwriting recognition feature work in
all languages? What about the text recognition feature?
Answer:
At this point in time, the handwriting recognition feature works only in English.
The text recognition feature does not support the following MimioStudio 9.1
languages: Bahasa Indonesian, Bahasa Malay, Basque, Croatian, Hindi,
Romanian, Slovak.

111
Updated March 2017
How can I activate MimioStudio software? What if I lost my
product key?
Answer:
To activate MimioStudio software—even without a product key—connect any
Boxlight Mimio hardware device to your computer directly with the USB cord.
The MimioHub alone will not activate unless it is paired to the device and the
device is powered on.
Does the MimioView camera work with Skype?
Answer:
The MimioView document camera can be used as a webcam with any video
conferencing application that supports Window UVC devices, including Skype,
Eluminate, iChat, and Citrix. We have tested it with Skype and it works with no
additional setup. You can now have a MimioView camera in one room—either in
the same building or across the globe—and students can tune in on their PC to
see what is happening in a class or in an experiment under the camera. Just go
to www.skype.com, download the small application, set up a username, and log
in. The software will recognize the MimioView camera as a "USB Video Device."
There is one step that may be required if your PC has a built-in camera, or if
another camera source is connected or set up. Follow the steps outlined below to
change the PC camera to the MimioView camera. First, make sure the
MimioView camera is connected to the computer.
Windows:
1. Go to Skype Tools Options.
2. Select the Video Settings icon, to the left of the "Skype - options" dialog
box.
3. Once in Video Settings, close MimioStudio software, then select "USB
Video Device" from the "Select Web cam" drop-down menu.
Mac:
1. Make sure you have the latest version of Skype (5.1.0.104 or later). Go to
Skype Preferences.
2. In the Skype Preferences dialog box, select the Audio/Video icon.
3. In the Camera drop-down menu, change the camera to the MimioView
camera.

112
Updated March 2017
Is it possible to deploy MimioStudio software across a network
to multiple machines?
Answer:
MimioStudio software can be installed across a network using Windows SCCM
with Group Policy, but we do not officially support silent installations as every
environment is different. With so many different applications that can be used, we
cannot standardize instructions. A silent installation is one that runs without
displaying any user interface. The setup parameters are typically specified on the
command line. See below for the command line to be used through this
installation.
The MSI installer for MimioStudio 10 software for Windows does enable "silent"
install; however, the activation for a new machine installation must still be done at
the host computer (for the Boxlight Mimio device). The activation will happen
automatically and permanently by connecting a Boxlight Mimio device to the
machine. Otherwise, you can use the license key supplied with the original
system CD to activate the software. If it’s an upgrade from an already activated
MimioStudio 7.0 software, then that machine will not have to be activated again.
The MSI installer for MimioStudio 11 allows for the option to include the
activation codes within the silent install. Please reach out to us at
[email protected] to obtain the file and basic instructions on including
the activation codes in your silent installation. We do not have the ability to
provide additional help—as we do not officially support silent installations—but
we can provide you with the files and paths to use.
The main part of the installation program is a Windows Installer package
(example: mimiostudio.msi) that is run by MSIEXEC.
Among the various MsiExec parameters, the /q option is used to set the user
interface level. Usually q or qn creates no user interface.
An example for Silent Installation is below:
"<Path>\mimiostudio.msi" /qn ALLUSERS=1 /Lvuc <Path>\install.log
Where <Path> is the actual path where the MSI file is located and the install log
would be created. ALLUSERS parameter is used to install the application for all
the users on the computer. /L flag is used to create the log file.
These articles may be helpful:
Using Group Policy to Deploy Application
http://www.windowsnetworking.com/articles_tutorials/Group-Policy-Deploy-
Applications.html

113
Updated March 2017
Best Practices for Group Policy Based Application Deployment
http://www.windowsnetworking.com/articles_tutorials/Best-Practices-Group-
Policy-Based-Application-Deployment.html
How do I get the MimioMobile App?
Answer:
The MimioMobile app can be downloaded at no cost from the iTunes store
(Apple) or the Google Play store (Android) to as many mobile devices as desired.
To utilize the MimioMobile app on the mobile device in a class, MimioStudio 10+
software must be installed on the teacher’s computer, and a MimioMobile license
for the classroom must be purchased and activated to connect more than 3
mobile devices at the same time. That way, every student with a mobile device
can interact with the lesson displayed on the interactive whiteboard. Each
classroom will need to purchase their own license or a school-wide license in
order to utilize the unlimited version of the MimioMobile app in multiple
classrooms.
How many iPad devices can I use as a MimioVote handset?
Answer:
There is no limit to the number of iPads that can be used as a MimioVote
handset device.
How many devices (windows) can be used to "collaborate"?
Answer:
With MimioStudio 10, you can collaborate with up to 9 students and 1 teacher
using any mix of MimioPad tablets. With an activated version of MimioStudio 11,
you can connect up to 3 devices for free. With an activated version of
MimioMobile using MimioStudio 11, you can connect an unlimited amount of
devices.
Does the MimioMobile app connect via the MimioHub USB
wireless receiver?
Answer:
No, the MimioMobile app communicates with MimioStudio 10 and above
software using the school's Wi-Fi network.

114
Updated March 2017
What are the Gestures in MimioStudio 10 software or later?
Answer:
See the following table for the Gestures in MimioStudio 10 software.
